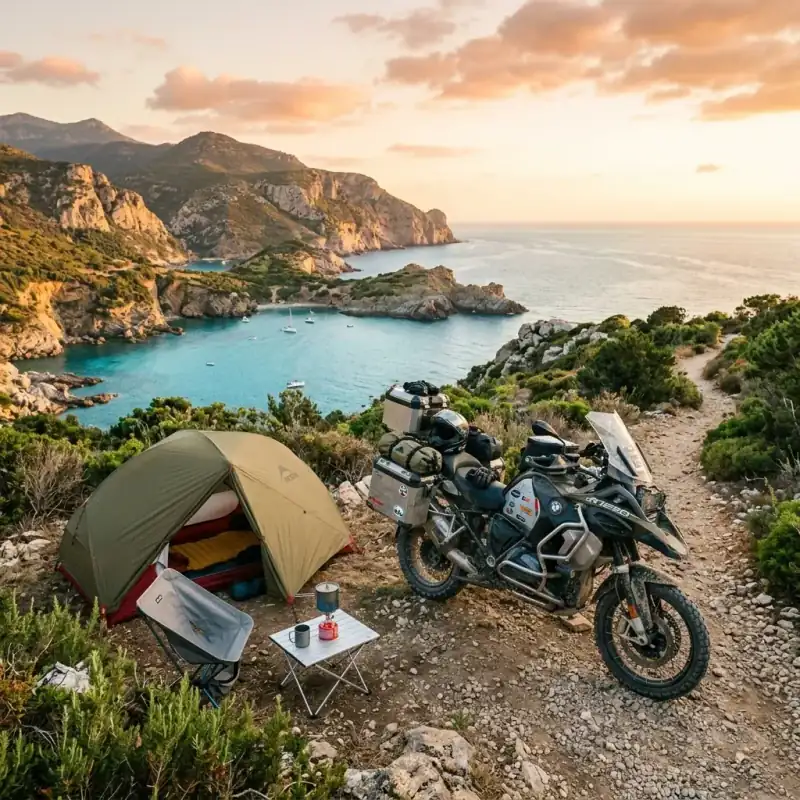
Most first motorcycle camping trips are packed like a car trip: too much gear, strapped high with bungee cords, and the things that must stay dry riding on top of the bike instead of inside a dry bag. This checklist is the shorter list that fits a bike.
Add up the published weights of the picks below and a dialled-in kit for a bike like the Yamaha Ténéré 700 comes to roughly 14 kg, small enough for two side bags plus a tail roll. The difference isn’t more gear. It’s less, chosen better.
It is organised category by category — what earns its space, what gets swapped out, and the budget-vs-upgrade decision in each — as the short list of gear that survives the trade-off between comfortable enough and small enough to ride with.
What to Look for in Motorcycle Camping Gear
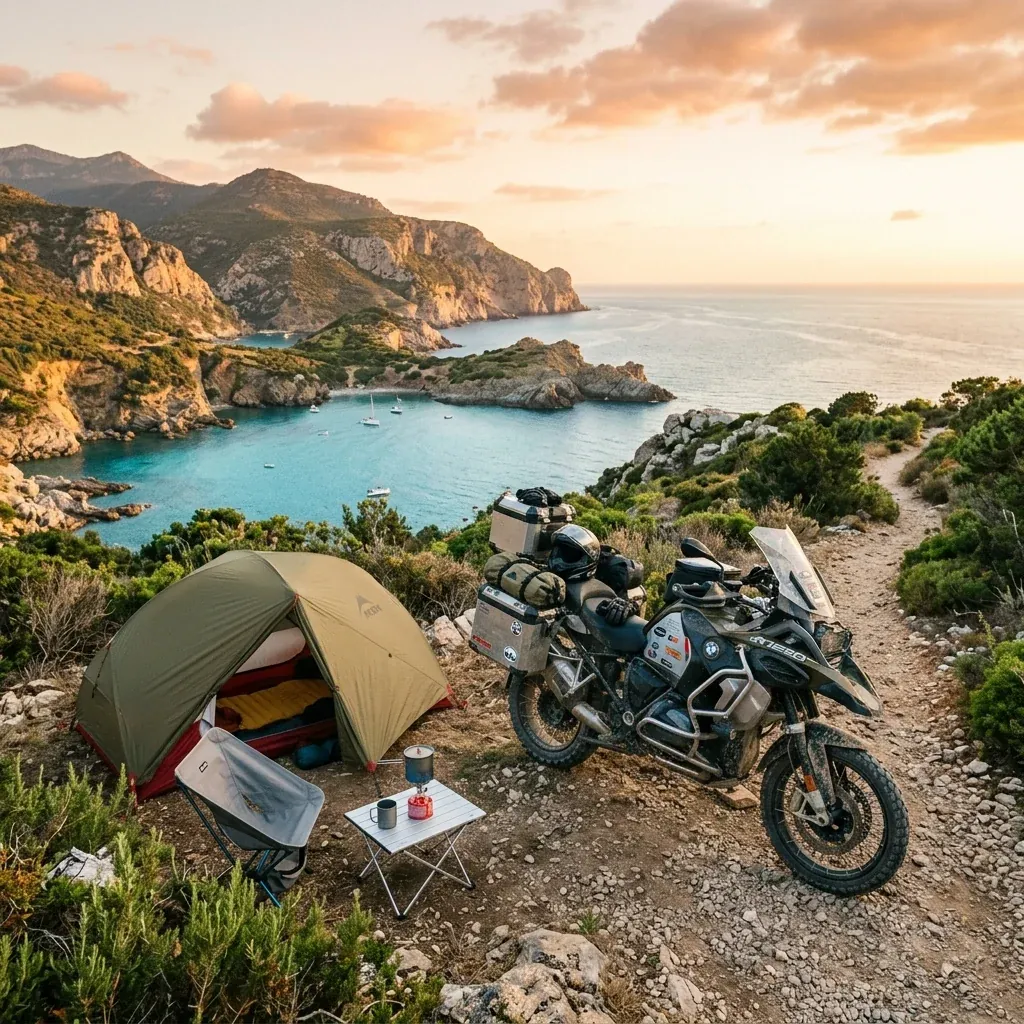
Three numbers matter when you’re choosing gear for a motorcycle, and they’re not the same three a backpacker cares about.
Packed volume is the first cut. Bike luggage is measured in liters, not square feet. A tent that compresses to a 40 × 13 cm bundle disappears in a tail bag. A tent the same weight but stuffed into a stiff 50 × 20 cm cylinder eats a third of a pannier. The number on the spec sheet that matters most is packed size, not trail weight.
Weight balance is the second cut. Two kilos on the centerline barely register. The same two kilos cantilevered out to one side changes how the bike steers on gravel and in crosswinds. Always think of gear in pairs — what goes on the left mirrors what goes on the right within about a kilo, and the heaviest items sit low and central.
Setup speed is the third cut, and it’s the one most people ignore until day three of a trip. After a 400 km riding day, the difference between a tent that pitches in 4 minutes and one that takes 12 is whether you cook dinner before dark. Premium gear earns its money partly here — on the days you arrive late, cold, and tired and need the camp to come together fast.
Everything else — fabric specs, R-values, lumen counts; matters less than these three.
How this checklist is organized
Seven categories, in roughly the order they matter when you arrive at camp tired and it’s getting dark:
- Shelter. The tent that has to stand up tonight
- Sleep system — bag, pad, and pillow as one unit
- Camp kitchen — stove, pot, water, and the spork
- Camp comfort — light source and a chair
- Luggage & packing — how the kit attaches to the bike
- Tools, safety & navigation. The breakdown-to-back-on-the-road category
- What you wear — riding kit and a clean layer for camp
Each section has a budget pick and an upgrade pick, and a “Go deeper” link to the full guide if you want the long version.
1. Shelter: the tent
A tent is the one thing you genuinely cannot skip. For a motorcycle the spec sheet that matters isn’t “trail weight”. It’s packed pole length (does it fit across a 30L pannier without sticking out?), vestibule space (room for a wet helmet, boots, and a tank bag), and how fast it pitches in wind after a long day in the saddle.

The sensible minimum is a two-person lightweight backpacking tent under 2 kg. Even riding solo, the second person’s footprint is where your helmet, boots, jacket, and tank bag sleep. A true one-person tent forces you to leave half your gear in the vestibule getting rained on. The extra 200 grams for a two-person model is the best weight you’ll ever carry.
The three picks below cover the full price range from “I want to try this before I commit” to “I’m doing this for the next five summers.”
- Budget / best value: the Naturehike Cloud Up 2 — about 1.6–1.8 kg packed depending on version, roughly the size of a loaf of bread, 20D silicone-nylon with a 4,000 mm rating quoted on current listings, at around $130. Better stakes, such as MSR Groundhogs, are the one upgrade worth making. The long-term reports on the Cloud Up 2 weighs its specs against the premium tents.
- Freestanding workhorse: the MSR Hubba Hubba — freestanding (no pegs needed to stand it up), two doors and a true rectangular floor that fits two pads side by side. The long-haul standard, at a premium price.
- Premium ultralight: the Big Agnes Copper Spur HV UL2 — 1.4 kg, two doors, two vestibules, the lightest livable two-person on this list. Use a footprint with this one. The 15D floor is paper-thin.
Always pack a footprint or groundsheet. It’s the cheapest insurance against a punctured floor on rocky bays. A $40 footprint protects a $400 tent. Skip it once and you’ll spend a night patching pinholes by headlamp.
Disclosure: some links on this page are affiliate links. If you buy through them we may earn a small commission at no extra cost to you.
Go deeper: Best Motorcycle Camping Tents 2026 · Best Ultralight Tents — 8 Picks · garage-style alternatives in the tents guide, Outlaw included
2. Sleep system: bag, pad, pillow
Treat the bag and the pad as one system. It is easy to focus on the bag’s temperature rating and under-spec the pad, but the ground steals more heat than the air does, and a warm bag on a cold pad still leaves you shivering at 3 a.m. The pad’s R-value matters as much as the bag’s comfort rating.
The right combination depends on season. Summer Mediterranean: a +5°C down bag plus an R-2 pad. Three-season shoulder months: a 0°C bag plus an R-3+ pad. Cold or alpine: −5°C bag plus R-4.5+ pad. Get the pad wrong and no bag in the world fixes it.
Sleeping bag
- Value down: the Kelty Cosmic 20 — real 550-fill DriDown warmth at about a third of premium prices. Compresses to roughly the size of a loaf of bread.
- Ultralight upgrade: the Sea to Summit Spark series — 850-fill, packs to the size of a 1L water bottle, the warmth-to-weight benchmark.
- Budget synthetic: dries faster in damp coastal mornings and survives being stuffed wet. The right choice for trips where condensation is constant.
Sleeping pad
- Insulated upgrade: the Therm-a-Rest NeoAir XLite NXT — 354 g, R-4.5, packs to roughly the size of a 1L bottle. The warmth-to-weight benchmark for moto camping.
- Budget: the Klymit Static V2 — durable, cheap, fine for summer at R-1.3. Heavier and bulkier than the NeoAir but it’ll take real abuse.
Pillow: a packable inflatable like a Trekology Aluft or Sea to Summit Aeros beats a rolled-up jacket on night three. Around 80 g and packs to the size of a deck of cards.
Go deeper: Best Sleeping Bags for Motorcycle Camping 2026 · Best Compact Sleeping Pads for Motorcycle Camping. Camping on cold, rocky, or wet ground a lot? A cot lifts you off it entirely; see Best Motorcycle Camping Cots.
3. Camp kitchen
The whole kitchen should nest inside the pot and weigh under a kilo. On a motorcycle the choice is between an all-in-one boil system (fast, fuel-efficient, perfect for rehydrated meals and morning coffee) and a stove + pot setup (more flexible if you want to actually cook).

Boil systems win on speed and fuel efficiency — Jetboil quotes about two minutes to boil half a litre on the current Flash, and an integrated heat exchanger wastes less of the flame than an open pot does. The trade-off is bulk and inflexibility: you boil water in them well, you can’t really simmer rice or fry an egg.
Separate-burner stoves like the PocketRocket are a little slower and thirstier in wind, but you can cook real meals on them. For solo riders mostly drinking coffee and rehydrating freeze-dried food, the boil system wins. For two riders or anyone who likes to cook from raw, the separate burner is the right call.
- Boil-and-go: the Jetboil Flash — about two minutes for half a litre on Jetboil’s figure, integrated wind-resistant burner, the polished system. Ideal if you mostly rehydrate meals and need coffee in your hand fast.
- Budget / flexible: the MSR PocketRocket 2 — 73 g, pairs with any pot, real flame control so you can simmer. The sensible first stove for almost any new moto camper.
- Cookware: a single nesting set like a GSI Pinnacle or a Sea to Summit X-Pot covers everything. Don’t bring more than one pot.
- Utensil: one titanium long-handle spork is all you need. The long handle reaches the bottom of a freeze-dried bag without coating your knuckles in sauce.
- Water: the Sawyer Squeeze filter plus a collapsible 2L bottle (Cnoc or Platypus) means you can camp wherever there’s a stream; no need to hunt for a tap or carry days of water on the bike.
Go deeper: Best Portable Camp Stoves for Riders · Best Motorcycle Camping Cookware 2026
4. Camp comfort: light and a chair
These two items earn their space faster than anything else after a long day in the saddle. Skip them once and you’ll buy them before the next trip.

Lighting — bring two sources, never one. A headlamp for hands-free tasks (pitching, cooking, finding the toilet at 2 a.m.) and a small lantern for 360° camp light so you’re not constantly aiming a beam at your dinner. Two redundant sources also means a dead battery on one doesn’t end your evening.
- Headlamp: Black Diamond Spot or Petzl Actik Core — both around 90 g, 350+ lumens, USB-rechargeable. Get the rechargeable version, not the AAA; one cable charges everything.
- Lantern: the Black Diamond Moji R+ is tiny and rechargeable. For brighter, all-night light go BioLite AlpenGlow 500 or Goal Zero Lighthouse.
Camp chair. The upgrade riders regret skipping. A folding seat changes the evening. You sit, you cook, you read, you watch the sunset. A rock or a log lasts about twenty minutes before you want your chair back.
- Premium: the Helinox Chair Zero — about 490 g, packs to the size of a 1L water bottle, comfortable for hours. The reference standard.
- Soft ground: the Helinox Chair Zero LT weighs about the same as the Zero and adds an anti-sink strap for sand and mud, though reviews of how well it works are mixed.
- Budget: the Trekology Yizi Lite — about a third of the Helinox price, a touch heavier, still packs small. The right starter chair.
Go deeper: Best Motorcycle Camping Chairs compares all five side by side.
5. Luggage & packing
Your camping kit should live in one bag you can grab off the bike whole. Keep the dewy tent away from your clean clothes in the panniers, and keep the daily-access items (rain layer, water bottle, snacks) somewhere you don’t have to unstrap a duffel to reach.
The realistic setup is soft panniers + tail dry bag + tank bag. Panniers hold the bulk (sleeping bag, clothes, tools), the dry bag on the tail holds the tent and pad, the tank bag holds wallet, phone, snacks, gloves liner.
- Soft panniers: the Mosko Moto Backcountry 35L — quick-mount wedge, latch on and off in seconds, and a welded-seam dry bag inside each pannier. The premium end of soft luggage, and priced like it. Full breakdown in our Mosko Moto Backcountry 35L review.
- Tail dry bag: a 30–40L roll-top from SealLine or Sea to Summit. Welded seams, not stitched. Stitched seams leak in the first heavy rain.
- Tie-downs: Rok Straps are the rider-favourite. Bungee cords stretch, work loose, and snap into your face. Rok Straps don’t.
Strap discipline matters more than people admit: every external strap should be tightened until it’s quiet, then checked once more after the first 20 km. A loose strap becomes a flapping bag, and a flapping bag wears through fast at motorway speed.
Check Motorcycle Dry Bags on Amazon →
Where each thing goes
One layout that works for a two-week trip on soft luggage, with dense items low and the bulky, light ones on the tail:
- One pannier: garage and kitchen. Tool roll, compressor, plug kit and tyre irons at the bottom; stove, gas and pots in the middle; dry food on top. This is the heaviest bag, so it rides low.
- Other pannier: camp and cleanup. Chair, stakes, footprint and paracord at the bottom; first-aid kit, water filter and wash kit in the middle; camp shoes on top. Lighter, but close enough that the bike doesn’t lean at a stop.
- Tank bag: anything you need without stopping. Phone with offline maps, passport and documents in a waterproof folder, wallet, power bank, earplugs and the rain shell.
- Tail bag: the bedroom. Tent, sleeping bag in a compression dry sack, pad, pillow and a clothing dry bag. It sits high, but it’s mostly air.
Four habits matter more than the layout:
- Test-ride the loaded bike for half an hour before the trip: some motorway, a few sharp corners, one firm stop. A loose strap or a preload set too soft for the load shows up at home, where it’s cheap. A loaded bike also leans further on its side stand.
- Waterproof twice. Every pannier lets water in eventually, usually at a zip or a seam. The sleeping bag, clothes and electronics go in their own dry bags inside it (dry bag guide).
- Pack by order of use. The thing you need first goes on top, even if it costs a little balance. If a roadside downpour means opening more than one bag, it’s packed wrong.
- Tape the paint where straps touch it. Soft straps rub through a finish over a season; protective film on the contact points stops it.
Go deeper: Best Adventure Motorcycle Panniers 2026 · Pack My Bike load-balance tool
6. Tools, safety & navigation
The category that turns a remote breakdown from a three-day rescue into a one-hour delay. None of this is optional, none of it should be cheap, and almost all of it should live in the same place on the bike every trip so you can find it in the dark.
Tire repair is the single most likely thing to ruin a trip. A nail, a sharp stone, a thorn — any of them turns a great riding day into a recovery operation. A tubeless plug kit plus a way to re-inflate is the difference between a 30-minute roadside fix and a tow.
- Tool kit + tire repair: a function-organized roll, a tubeless plug kit (Dynaplug or Stop & Go) and a mini compressor or CO2 cartridges. Practice the plug procedure in your garage once before you actually need it.
- Multi-tool: a Leatherman lives in the tank bag. Pliers, knife, file, screwdriver bits. It covers most of the camp tasks the bike’s tool roll doesn’t.
- First aid: an Adventure Medical Kits pouch sized to your trip. Don’t carry an oversized one and don’t carry a sub-50-piece “compact” one. Mid-size.
- Power: an Anker PowerCore 10,000–20,000 mAh bank keeps the phone, GPS, headlamp, and intercom alive for 3–4 days off-grid. Charge it from the bike’s USB port while you ride. The full breakdown of power banks, solar panels, and bike-mounted charging for multi-day off-grid trips is in the motorcycle camping power and charging guide.
- Navigation: a dedicated, glove-friendly GPS such as the Garmin Zumo XT2 or its newer XT3, or a phone in a vibration-damped mount. Whether the GPS is worth it over a phone is covered in the Zumo XT2 vs phone guide.
- Comms: an intercom like the Cardo Packtalk Edge or Sena 50S. For solo riders an intercom matters less, but turn-by-turn navigation in your ear keeps your eyes on the road. See the motorcycle intercom comparison.
- Solo safety: a Garmin inReach Mini 2 satellite messenger if you camp out of cell range. Two-way SMS over satellite, SOS button, position tracking. For solo riders in remote terrain it’s the single most important few hundred dollars you’ll spend (Garmin has since added the Mini 3).
Check Tubeless Plug Kits on Amazon →
Go deeper: Field tool kit checklist · Solo camping safety
7. What you wear
Riding gear is its own checklist, so here’s the short version: protective ATGATT (all the gear, all the time) on the bike, plus one set of light off-bike clothes for camp. Two pairs of camp socks. One travel towel. That’s it.
The temptation is always to pack a second jacket, a second pair of pants, “just in case.” Don’t. Wash your camp shirt in a Sawyer-filtered stream and hang it from the tent guyline. It’ll dry overnight. Clothes are the easiest category to over-pack and the one that eats the most pannier space when you do.
- Jacket: if you’re shopping at the top end, the Klim Badlands Pro is the touring-and-adventure benchmark: a laminated GORE-TEX Pro shell and CE Level 2 armour as standard. Full review here.
- Camp layer: one packable down or synthetic insulated jacket. Doubles as a pillow stuff inside a stuff sack.
The printable checklist
Copy this, trim it to your trip, and tape it inside a pannier lid. The bullets are the categories; fill in your specific gear next to each.
Toggle Interactive Packing Checklist
- Shelter: tent · footprint · pegs/guylines · repair tape
- Sleep: sleeping bag · pad · pillow · liner (optional)
- Kitchen: stove · fuel canister · pot · spork · lighter + backup · water filter · collapsible bottle · coffee
- Comfort: headlamp · lantern · chair · power bank · charging cables
- Luggage: dry bag · panniers · tie-down straps · compression sacks
- Tools/Safety: tool roll · tubeless plug kit · compressor or CO2 · multi-tool · first aid · zip ties · duct tape · chain lube
- Navigation/Comms: GPS or phone mount · intercom · paper map backup · satellite messenger (remote trips)
- Wear: helmet · jacket · pants · gloves · boots · rain layer · camp clothes · camp socks · travel towel
Final word
Don’t buy the whole list. Start with a tent, a sleep system, and a stove, then add one comfort item per trip until the bike still handles the way you like and the panniers still close. The best motorcycle camping kit isn’t the lightest or the most expensive. It’s the one you can pack in ten minutes, ride all day without thinking about, and set up at camp before the sun is fully down.
Building the list from nothing, and willing to wait for a sale? when to buy motorcycle camping gear covers the order to buy it in — pad first, tent last — and why that sequence gets the most comfort per pound.
When the kit is sorted, point it somewhere worth it: Wild Camping in Turkey on a Motorcycle · Long-distance trip planning checklist.
A note on the figures: prices and costs on this page are indicative as of May 2026, not quotes. Retail prices, fares, fees and premiums all move — check the current figure before you rely on it.
Frequently Asked Questions
How much does a full motorcycle camping setup cost?
A solid budget kit (Naturehike tent, value down bag, Klymit pad, PocketRocket stove, Trekology chair) comes to roughly $450–$550 at typical prices. A premium kit (Copper Spur, Spark bag, NeoAir XLite NXT, Jetboil Flash, Helinox Chair Zero) is about three times that, around $1,400–$1,700. Both will get you the same night under the stars. The upgrade buys weight savings, pack size, and longevity — not a better view.
How do you pack camping gear on a motorcycle?
Heavy and dense low and central (tools, water, fuel) so they don't unsettle the bike in turns. Bulky-but-light up high or on the tail (tent, sleeping bag). Daily-access items on top. Balance weight left-to-right within 1–2 kg per side. Run the layout through our Pack My Bike simulator before you ride out to catch lateral imbalance before it bites you on gravel.
Do you need a special tent for motorcycle camping?
Not a dedicated one — a good lightweight backpacking tent works perfectly. What matters is packed pole length (must fit across a 30L pannier without sticking out), a vestibule big enough for a helmet and boots, and fast pitching in wind after a 10-hour ride. Dedicated 'bike garage' tents like the Lone Rider Mototent are a niche for big ADV riders who want to park the bike inside — overkill for everyone else.
What's the one thing beginners forget?
Two things, actually. First, a way to charge devices off-grid — a 10,000+ mAh power bank keeps your phone, headlamp, and GPS alive for 3–4 days. Second, a tubeless plug kit and a mini compressor. The first keeps your navigation alive when you're miles from a plug; the second keeps a single nail from ending the trip.
Is wild camping legal where I'm riding?
Depends on the country. Norway, Sweden and Finland (the right to roam) and Scotland have legal access rights, on foot rather than by vehicle in Scotland; elsewhere it varies country by country, and some, like Croatia, ban it outright and fine it. France, Spain and Italy restrict it, with local rules on top. Turkey is permissive in remote areas but closes forests in fire season. Always check local rules, leave no trace, and avoid pitching within sight of a road or a private boundary. Our wild camping guides cover specific regions in depth.