
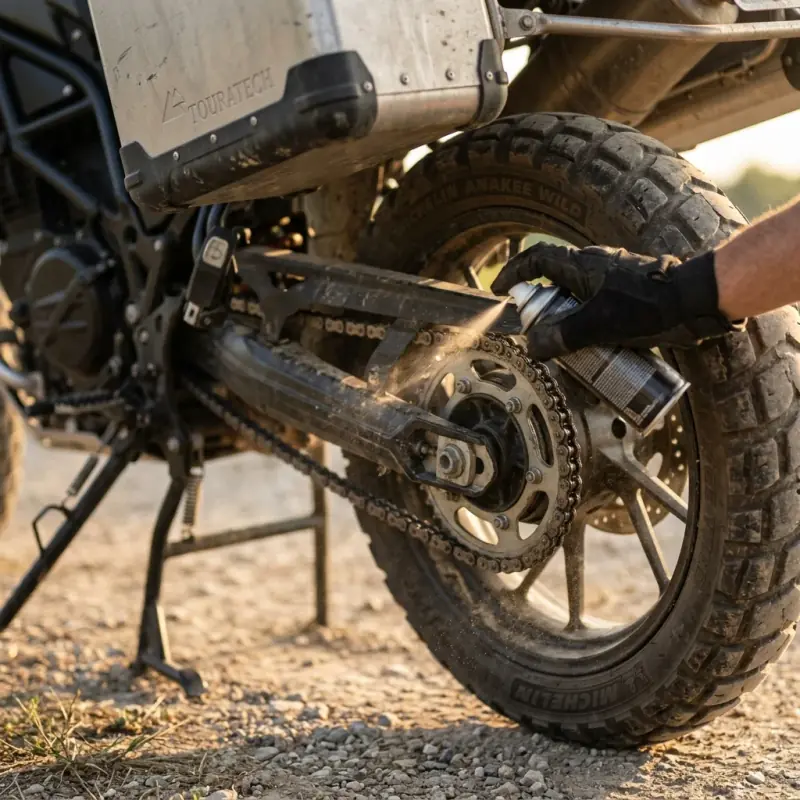
Of all the things that wear out on a motorcycle, the chain is the one that does the most work, sees the most abuse, and gets the least attention. It’s out in the open, flung with everything the road throws up, and it transfers every bit of your engine’s power through a few square millimetres of steel rollers. Neglect it and it doesn’t fail politely: a dry, worn chain eats its sprockets, robs you of power and fuel economy, and in a rare bad case can lock a rear wheel or whip off and take an engine case with it. Look after it and a good chain lasts many thousands of miles and asks very little in return.
On a long trip the stakes go up, because a touring chain gets the full treatment — days of rain, dust roads, salt air near the coast, mud — with no garage to retreat to at night. This guide covers the whole job properly: how often it really needs doing, how to clean and lube it without damaging the seals, how to do all of it on the road with nothing but a sidestand, and how to check the slack that quietly decides how long the whole drivetrain lasts.
How Often? “It Depends” Is the Honest Answer
You’ll see a number thrown around a lot: clean and lube every 300–600 miles, or roughly 500–1,000 km. That’s a reasonable baseline for steady road riding, and if you want a rule of thumb to start with, use it. But it’s a floor, not the whole story, because the thing that really governs chain care isn’t distance. It’s what the chain has been through.
- Rain strips lube. A wet day can wash a freshly lubed chain nearly clean, so after riding in sustained rain the chain may want re-doing regardless of the miles.
- Dust and dirt roads are worse than rain. Fine grit sticks to the lube and turns it into a grinding paste that wears the chain and sprockets from the outside in. On a dusty or off-road tour, riders often re-lube at the end of every riding day.
- Hard, fast road miles heat and sling lube off faster than gentle ones.
So the practical rule is: look at the chain, not the trip meter. If it looks dry, dull, brown, or gritty, it’s asking for attention whatever the number says. A rider commuting on dry tarmac and a rider crossing a dusty Trans Euro Trail section will land on wildly different intervals, and both are correct for their conditions. Getting a feel for your chain in your conditions is worth more than any fixed mileage.
Clean, Dry, Lube — the Three Steps That Matter
The job is simple, but two details matter enormously: what you clean with, and letting it dry before you lube.
1. Clean — but mind the seals
Almost every modern motorcycle chain is a sealed chain: tiny rubber O-rings (or X- or Z-rings, which are the same idea with a better-sealing profile) trap factory grease inside each link, where it does the actual lubrication that keeps the chain alive. Your cleaning and lubing is really about protecting and supplementing that, not replacing it — which is exactly why harsh chemicals are a problem. A solvent that swells or degrades those rubber seals lets the internal grease escape, and no amount of external lube brings a seal-blown chain back.
This is the one area where popular advice openly conflicts. Some riders happily clean with kerosene or diesel and report no harm; chain makers like D.I.D specifically warn against volatile solvents — gasoline, benzene, paint thinner and the like. When the sources disagree that sharply, the sensible move is not to bet your chain on it: use a cleaner labelled O-ring/X-ring safe, or a dedicated motorcycle chain cleaner. Spray it on, give it a minute, and work it in with a proper chain brush. The three-sided kind wraps around the chain and cleans the rollers and both side plates in one pass.
Disclosure: some links below are affiliate links. If you buy through them we may earn a small commission at no extra cost to you.
Check the Motion Pro chain brush on Amazon →
One rule with no exceptions: never use a wire brush. The steel bristles will nick and tear the O-rings — the single mistake here you can’t undo. Soft brush, safe cleaner, and a rag are all you need.
If you’d rather buy the whole job in one box, a chain care kit that pairs a seal-safe cleaner with a matching lube and a brush takes the guesswork out; handy to keep as a set at home and decant for the road.
Check the Motul Chain Care Kit on Amazon →
2. Dry it completely
Wipe the chain down and let it dry before you lube. Lube laid over a wet or solvent-damp chain doesn’t adhere or penetrate properly, and any cleaner left on there can keep working at the seals. A clean rag and a few minutes is all it takes.
3. Lube — and less is more
Apply a chain lube — again, one that’s O-ring safe — to the inner face of the chain, where centrifugal force will carry it outward through the links as the wheel turns, rather than blasting it all over the outside. Rotate the chain so you cover its whole length, then, crucially, stop before you’ve overdone it. Too much lube doesn’t lubricate better; it flings off onto your wheel and swingarm and, worse, the sticky excess catches dust and grit and turns into the very grinding paste you’re trying to avoid. A light, even film is the target.
Check Motul C4 chain lube on Amazon →
If you can, lube a warm chain — right after a ride, or after a short spin round the block — because the warmth helps the lube creep in and any carrier solvent flash off. Then give it a little time to set before you ride hard (a few minutes at minimum; leaving it overnight is ideal), so it isn’t immediately slung off. This is the classic argument for lubing at the end of a riding day rather than the start.
Doing It on the Road, With No Garage
Everything above assumes you can spin the rear wheel freely, which a centre stand or a paddock stand makes easy. Here’s the reality for adventure riders: many ADV bikes — the Ténéré 700 is the well-known example — don’t come with a centre stand, and the swingarm-spool paddock stands sold for sportbikes generally won’t fit an adventure bike’s swingarm. So don’t assume you need one, and don’t buy the wrong one.
You have two good options on tour:
- If your bike has a centre stand, use it. It’s the easiest way to get the wheel spinning, and it’s worth fitting one as an accessory if your bike can take it. It earns its keep for chain care, tyre checks and roadside repairs alike.
- If it doesn’t, work in sections. Clean and lube the stretch of chain you can reach on the sidestand, then roll the bike forward a foot or two to bring the next section down, and repeat until you’ve gone all the way round (a paint mark on one link helps you know when you’ve done a full loop). It’s slower and a bit more fiddly, but it works perfectly well in a campsite with nothing but the stand the bike came with.
This “make it work with what you’ve got” mindset is the whole ethos of field maintenance — our Ténéré 700 roadside-maintenance guide and the trailside tool kit checklist cover the rest of the jobs you’ll want to handle away from home, and a small chain brush and a compact can of lube are worth their space in a pannier on any long trip.
Chain Slack: the 60-Second Check That Saves Drivetrains
Cleaning and lubing gets the attention, but chain tension quietly decides how long the chain, both sprockets and the gearbox output bearing last, and it’s the check most riders skip. As a chain wears it stretches, so slack increases over time and needs adjusting back into spec.
The critical thing: use your owner’s manual’s figure. The correct amount of free play varies significantly between bikes, and there is no safe one-size number. So look yours up rather than eyeballing it. Then check it properly:
- Measure the up-and-down movement in the middle of the lower run, and do it at the tightest point — rotate the wheel and check in several places, because a worn chain has tight and loose spots and you must set tension to the tightest one.
- Check with the bike’s weight settling normally and the transmission in neutral.
- Too loose lets the chain slap the swingarm, jump under power, and in the worst case derail. Too tight is arguably more damaging, because as the suspension compresses the chain pulls bar-tight and hammers the chain and the output shaft bearing.
Adjusting it — and keeping the wheel straight. If the slack is out of spec, correcting it is simple, but there’s one step you can’t skip. Loosen the rear axle nut, then turn the chain adjuster on each side of the swingarm by equal amounts to draw the wheel back until the slack matches your manual’s figure. The “equal amounts” part is the safety-critical bit: use the alignment marks stamped on the swingarm (or measure both sides) so the rear wheel keeps tracking in line with the front. Set the adjusters unevenly and the wheel runs at a slight angle, which chews through the chain, sprockets and tyre and makes the bike feel vague. Once the slack is right, torque the axle nut back to the figure in your manual with a torque wrench — an axle nut done up by feel is a genuine safety item, not a detail — and re-check the slack afterwards, since final tightening can nudge it.
While you’re down there, look for wear: if the chain is worn to the back of the adjuster marks, if you can pull it away from the rear sprocket far enough to nearly clear the tip of a tooth, or if the sprocket teeth are wearing into a hooked, wave-like shape, the drivetrain is near the end of its life and it’s time to plan a chain-and-sprocket set rather than another adjustment. Fresh rubber and a fresh chain both noticeably sharpen how a tired bike rides — the same logic as our adventure tyres guide, where the cheapest handling upgrade is often just replacing what’s worn out.
The Bottom Line
Chain care is one of the highest-return, lowest-effort jobs on a chain-driven bike. A few minutes with a safe cleaner, a soft brush, and a light film of lube — done as often as the conditions demand rather than a fixed number — keeps the whole drivetrain running smooth, quiet and efficient, and turns a consumable into something that lasts. Get the three things right that actually matter: seal-safe products and never a wire brush; a light touch with the lube; and slack set to your manual’s figure at the tightest point. None of it needs a workshop — just a sidestand, a rag, and the habit of looking at the chain instead of the odometer.
Keep that habit up and your chain will outlast your interest in it. If you’re getting into your bike’s upkeep more broadly, our winter storage guide covers protecting the chain (and everything else) over a long lay-up, and the roadside flat-tyre repair guide rounds out the field-maintenance skills worth having before a big trip.
Disclosure: Some links in this article are affiliate links. If you buy gear through them, Bikes & Bays earns a small commission at no extra cost to you. We only link to gear that earns its place, and skip the button when nothing’s worth recommending.
Frequently Asked Questions
How often should I lube my motorcycle chain?
A common starting point is roughly every 300–600 miles (about 500–1,000 km), but that's a baseline for easy road use, not a rule. What actually drives it is the conditions: rain washes lube off, and dust and grit on dirt roads act like a grinding paste, so on a wet or dusty tour you may need to re-lube every day, sometimes after a single hard day. The honest answer is to look at the chain rather than the odometer — if it looks dry, dull or grimy, it needs attention regardless of the mileage. Riders who tour off-pavement lube far more often than commuters, and both are right for their conditions.
What can I use to clean a motorcycle chain — is kerosene safe?
This is where you have to be careful, because the advice genuinely conflicts. Modern chains are sealed with rubber O-rings (or X- or Z-rings) that hold grease inside each link, and harsh solvents can degrade those seals. Some riders use kerosene and report no problems, but chain manufacturers such as D.I.D explicitly warn against volatile solvents like gasoline, benzene and paint thinner. Given that disagreement, the safe path is not to gamble: use a cleaner specifically labelled O-ring (or X-/Z-ring) safe, or a purpose-made motorcycle chain cleaner. And whatever you use, never take a wire brush to the chain — the bristles damage the O-rings, which is the one mistake you can't undo.
Can I clean and lube my chain without a paddock stand?
Yes, and most touring riders have to. A paddock stand (or better, a centre stand) makes it easy by letting the rear wheel spin freely, but many adventure bikes don't have a centre stand from the factory and the swingarm-spool paddock stands sold for sportbikes usually don't fit an ADV bike anyway. Without one, you just work in sections: clean and lube the length of chain you can reach, then roll the bike forward a little to expose the next section, and repeat until you've gone all the way around. It's slower, but it works fine in a campsite or a lay-by with nothing but the sidestand.
How do I know if my chain is too loose or too tight?
Every bike has a specified amount of free play, and it's printed in your owner's manual — use that number, because it varies a lot between models and there's no safe universal figure. Measure the up-and-down slack at the tightest point of the chain (rotate the wheel and check in several spots, because chains wear unevenly), with the bike off its stand and the weight settling normally. Too loose and the chain can slap, jump or in the worst case come off; too tight is arguably worse, because it overloads the chain and the gearbox output bearing as the suspension compresses. If you can't get even slack anywhere, or the chain is worn to the back of the adjustment marks, it's telling you the chain and sprockets are near the end of their life.