
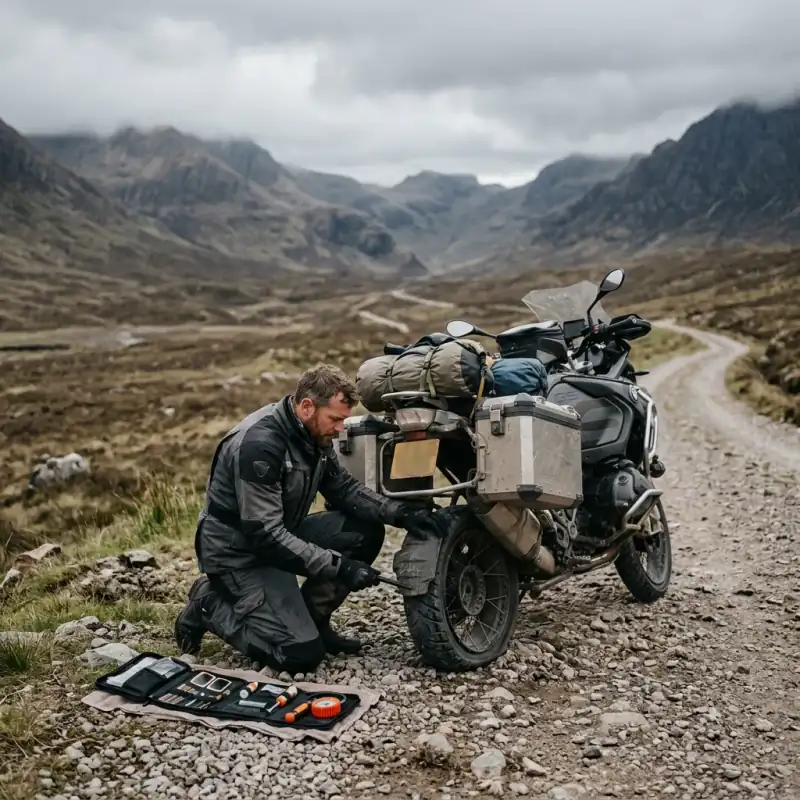
Every adventure rider has quietly rehearsed it: the bike squirming in a corner, the back end going vague, and the slow realization — a mile from anywhere, no signal, no tire shop for fifty miles — that you’ve picked up a puncture. It’s the kind of failure riders feel least prepared for, and, handled right, one of the least dramatic.
It doesn’t have to be an emergency. A flat in the middle of nowhere is a procedure, not a crisis — if you know the procedure. But here’s the part most tire-repair guides skip, and it’s the single most important thing on this page: how you fix a puncture depends entirely on whether your tire runs a tube. Get that wrong and the plug kit in your pannier is useless. So this guide starts where the fix actually starts — with figuring out what you’re dealing with — then walks through the repair for each type, and, just as importantly, the punctures you should never try to fix by the roadside at all.
Step One: Tube or Tubeless? (Everything Depends on This)
Before you touch a tool, work out what your wheel actually is. It decides whether the next hour is a quick plug or a full wheel-off job.
- Cast (alloy) wheels are almost always tubeless. The solid rim seals air by itself, so a puncture can be plugged from the outside without removing anything.
- Wire-spoked wheels usually run a tube. The spoke-nipple holes mean the rim can’t hold air on its own, so a tube does it — and a tube can’t be plugged from outside.
- The exception that catches people out: some modern adventure bikes (and aftermarket wheels) use sealed spoke nipples to run tubeless tires on spoked wheels. So spokes alone don’t prove you have a tube. Confirm it: many tires are stamped TUBELESS or TUBE TYPE on the sidewall, and your owner’s manual will say for certain.
This matters because a huge share of adventure bikes — the Ténéré 700, the Royal Enfield Himalayan, plenty of older GSs — run tube-type spoked wheels. If that’s you, the tidy tubeless plug kit everyone recommends will not fix your flat, and you need to be carrying (and practising with) tire irons instead. Knowing which camp you’re in, before you ever leave home, is most of the battle.
Step Two: Can This Puncture Even Be Repaired?
Don’t skip this for the satisfying part. Some punctures are safe to plug and ride home on; others will fail at speed and hurt you. The honest answer is that a lot of damage is simply not roadside-repairable, and knowing the line is what separates a good field repair from a dangerous one.
Repair only the central tread — roughly the middle 75% of the tire. Here’s the hard “no” list:
- Sidewall punctures: never. The sidewall flexes with every rotation and carries the tire’s structural cords. A plug won’t seat in flexing rubber, and reaming the hole permanently damages the casing — a repair there can let go suddenly and completely.
- Shoulder punctures: no. The shoulder deforms too much for a plug to keep its seal.
- Holes bigger than about 6 mm (1/4 inch): no. Beyond that size the plug can’t reliably hold.
- Cuts, gashes, tears, or multiple close-together holes: no. Repairs are for clean, round punctures, not slashes.
- A tire that’s been run flat, or is worn out: no. Running flat damages the inner liner, and a tire down near its wear bars won’t grip a plug and needs replacing anyway — a puncture just makes the decision for you.
If your puncture fails any of these, the tire is finished. Get the bike recovered, ride very gently and slowly to the nearest town if you genuinely have no other option, and replace the tire. A tire that lets go at highway speed is a far worse day than a long wait for a truck.
And even a textbook tread puncture gets you a temporary repair. A plug is a get-you-there fix; the durable repair is an internal patch-plug fitted by a shop from inside the tire. Ride to help, don’t declare victory.
Fixing a Tubeless Puncture (The Roadside Ten-Minute Job)
If you’ve got a tubeless tire and a tread puncture inside the limits above, this is genuinely straightforward and you don’t even remove the wheel:
- Find the leak and leave the object in until you’re ready — it’s marking the spot. Spraying soapy water shows the hiss of bubbles if you can’t see it.
- Pull the object out (pliers) and note the angle it went in at — you’ll want to ream and plug along that same channel, not straight in.
- Ream the hole with the kit’s rasp tool — in and out a few times — to clean it and rough the edges so the plug bonds.
- Insert the plug. Thread a sticky rope/string plug (or a mushroom plug on kits that use them) into the insertion tool, push it in until most of it is inside, and pull the tool straight out — the plug stays, sealing the hole.
- Trim the excess flush with the tread.
- Reinflate to the recommended pressure and check the plug holds with more soapy water.
A self-contained kit like the Stop & Go pocket tire plugger bundles the reamer, plugger, plugs and CO2 in one moto-sized pouch, which is why it’s a common choice for adventure riders.
Disclosure: some links below are affiliate links. If you buy through them we may earn a small commission at no extra cost to you.
Check Stop & Go tubeless kit on Amazon →
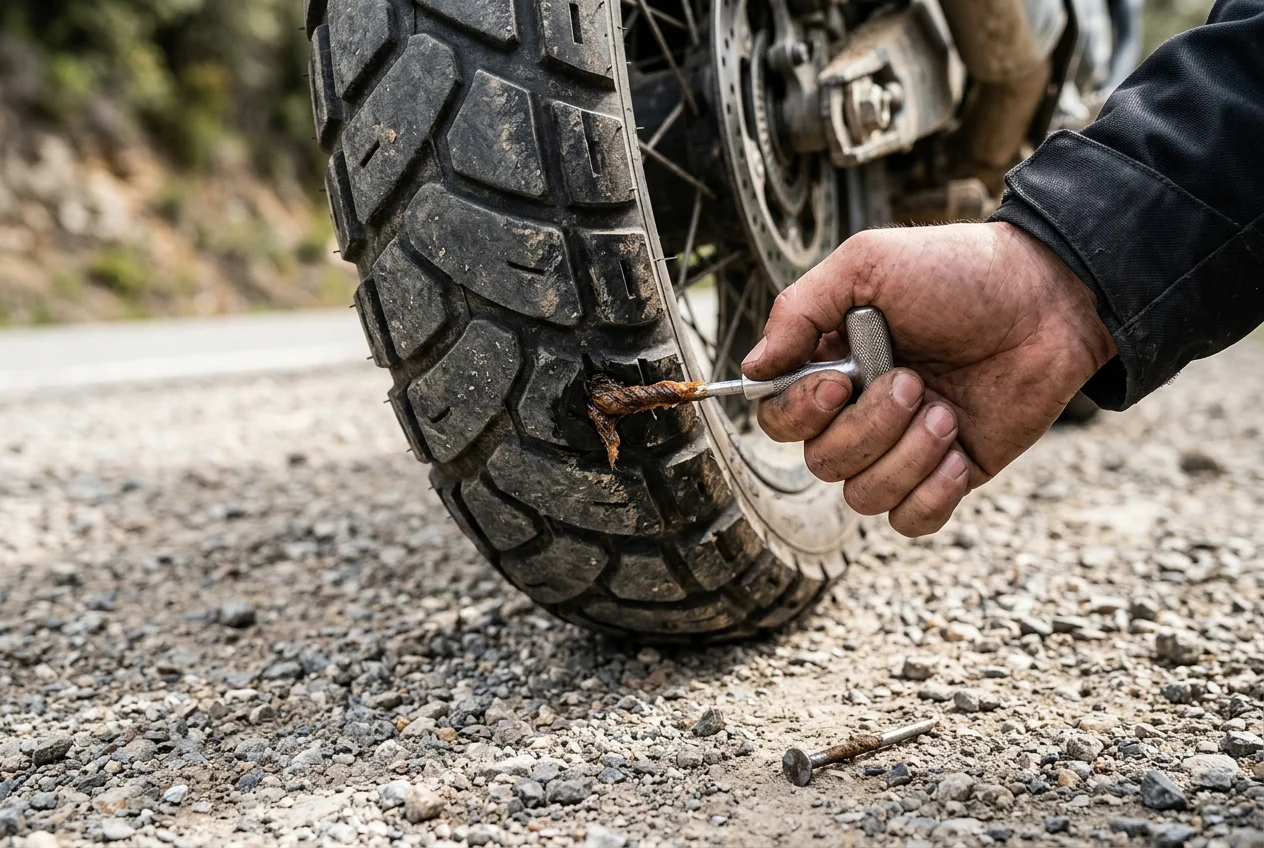
Then ride gently — moderate speed, no hard cornering on that tire — to somewhere it can be properly inspected.
Fixing a Tube-Type Puncture (The Real Job)
This is the one nobody enjoys, and the reason tube-type adventure riders need to practise it at home before they need it on a mountainside. There’s no shortcut: a tube can’t be plugged from outside, so the wheel has to come off and the tire has to come partly off the rim. Budget a good half-hour to an hour even once you’ve done it before — this is not the ten-minute job.
- Get the bike stable and the wheel off the ground — centre stand, a sturdy rock and a lever, or a travel stand. You cannot do this with the wheel loaded.
- Remove the wheel (this is why you carry the right axle tools).
- Deflate completely and break the bead. Take the valve core out so every last bit of air escapes — you can’t break a bead against trapped air. Then push the tire’s edge down off the rim’s lip and into the dropped centre of the rim, all the way around, both sides. With no bead-breaker tool this is the hardest single moment of the job: stand or press down hard on the sidewall right next to the rim — using your heels, a knee, or the side/centre stand as a lever — and work around in small steps. It fights back; keep going until the bead drops into the well.
- Lever one side of the tire off with tire irons, working in small bites and taking care not to pinch the tube.
- Pull the tube out and find the hole (inflate it, then listen or use water).
- Find what actually caused it — inside the tire. Before any tube goes back in, run your fingers carefully around the inside of the casing and feel for the culprit: a thorn, wire shard, or nail tip still embedded will puncture your fresh tube within a mile. Remove it, and check the rim tape and spoke ends for burrs while you’re in there.
- Patch or replace the tube. A proper vulcanising patch works, but fitting a fresh spare tube is far faster and more reliable by the roadside — which is exactly why carrying one earns its space.
- Refit carefully: put a little air in the new tube so it isn’t pinched, work the tire back over the rim with the irons, make sure the tube isn’t trapped under the bead, and keep the valve stem straight.
- Inflate, seat the bead, and refit the wheel — torqued to spec. Seat the bead with a firm burst of air, then torque the axle nut to your manual’s figure rather than guessing; an axle left under- or over-tight is its own hazard.
A set of proper tire irons is non-negotiable here — the flimsy short levers in cheap kits will fight you and risk pinching the new tube.
Check Motion Pro tire irons on Amazon →
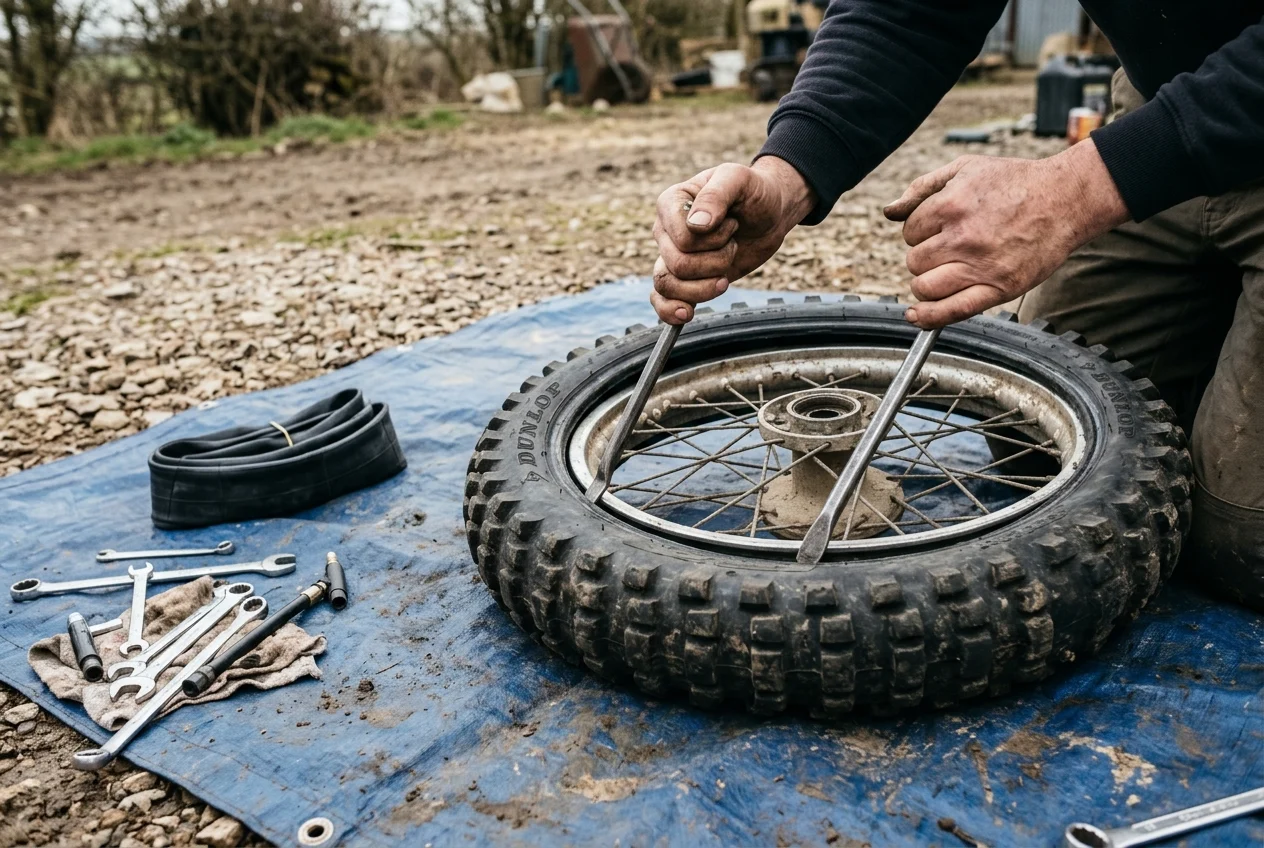
One safety note worth knowing: a punctured tube-type tire tends to lose air faster than a tubeless one, and once it goes soft the tire can slip on the rim and tear the valve stem — turning a slow leak into a sudden deflation. That’s part of why catching low pressure early, and repairing properly, matters so much on tubed wheels.
Reinflating: CO2 vs a Mini Compressor
Whichever repair you did, you need air, and there are two ways to carry it:
- CO2 cartridges are tiny and fast, but each holds a fixed, limited amount of gas. A big adventure tire can take several cartridges to reach pressure, and once they’re spent, they’re spent. Great as a compact backup; risky as your only method on a long trip. If you go this route, carry more than you think you need.
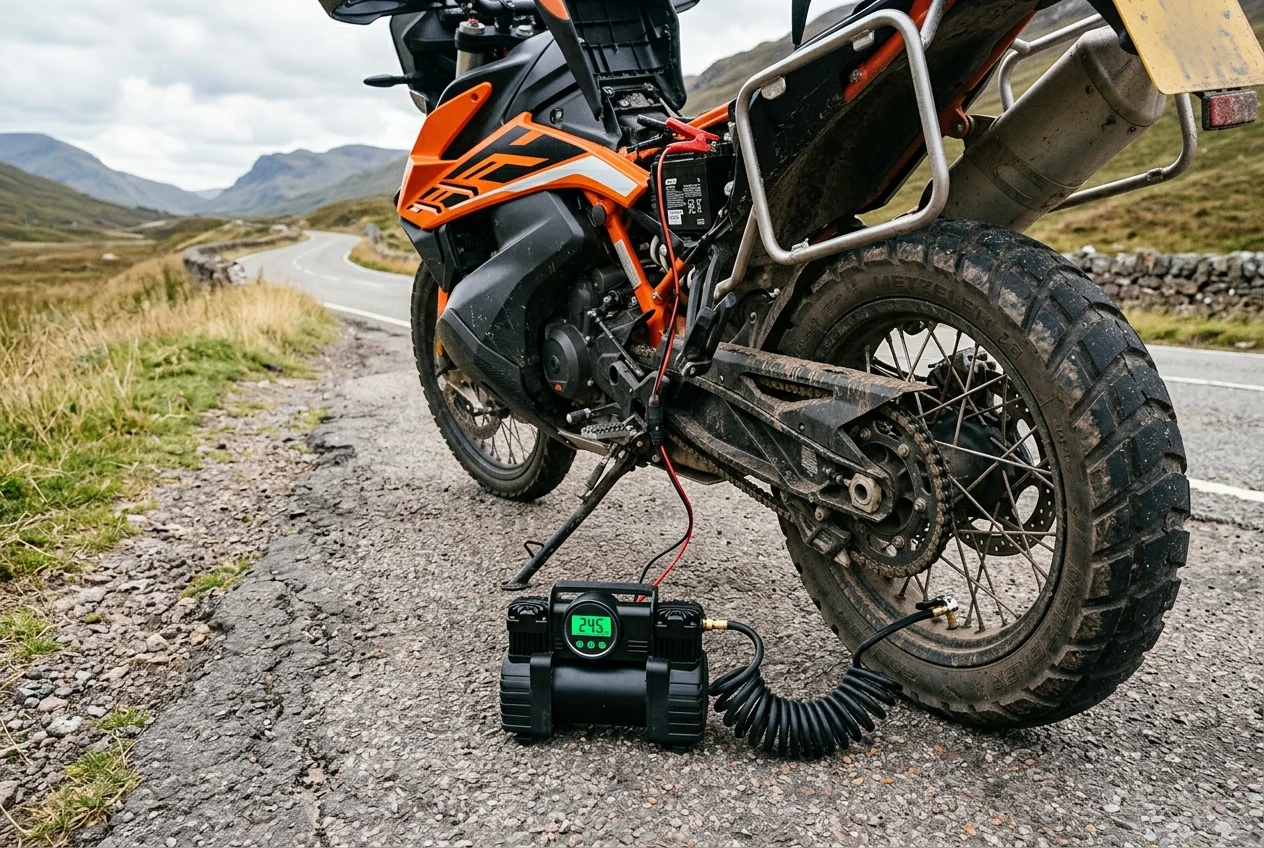
- A small 12V compressor runs off the bike’s battery and never runs out — slower and bulkier, but you can reinflate repeatedly (useful if you’re also airing down for off-road and back up for tarmac). For remote, multi-day riding where a second puncture is a real possibility, it’s the more dependable choice.
Check AstroAI inflator on Amazon →
Prevention: The Puncture You Never Have to Fix
The best roadside repair is the one you avoid. None of this is glamorous, and all of it works:
- Check your pressures regularly. Under-inflation flexes the casing, runs it hot, and makes punctures and pinch-flats far more likely — doubly so on tube-type tires.
- Watch tire age and tread. Old, hard, or worn rubber punctures more easily and holds a plug worse.
- Consider sealant — with eyes open. Pre-fitted sealants can auto-plug pinholes, but they can upset balance, make a mess that complicates later repairs, and do nothing for big holes or sidewall cuts. Some tire makers advise against them. It’s a personal trade-off, not a clear win.
- Carry the kit that matches your wheels, and practise with it. A plug kit is useless on a tube-type wheel, and tire irons are useless if the first time you use them is at altitude in the cold.
The Bottom Line
A puncture only becomes a disaster when it meets an unprepared rider. Sort out three things in advance and it becomes a manageable delay instead: know whether your bike runs tubes or not, carry the repair kit and air that actually match that answer, and know the punctures that are never safe to fix. Do a practice repair in the garage once — plug a dead tubeless tire, or break the bead and swap a tube — so the first time isn’t for real.
For the full list of what to carry, our trailside tool kit and spares checklist covers the complete kit; the Ténéré 700 field-maintenance guide goes deeper on fixing an adventure bike far from help, and our guide to the best adventure motorcycle tires covers choosing rubber that punctures less in the first place. Planning a big remote trip? Fold all of this into how to plan a long-distance motorcycle trip.
Disclosure: Some links in this article are affiliate links. If you buy gear through them, Bikes & Bays earns a small commission at no extra cost to you. We only link to gear that earns its place, and skip the button when nothing’s worth recommending.
Frequently Asked Questions
How do I know if my motorcycle has tube-type or tubeless tires?
The quickest tell is the wheel. Cast (alloy) wheels are almost always tubeless — the solid rim seals air on its own. Traditional wire-spoked wheels usually run a tube, because the spoke-nipple holes in the rim mean it can't hold air by itself. The catch is that some modern adventure bikes use sealed spoke nipples to run tubeless tires on spoked wheels, so spokes alone aren't proof. Check the sidewall — it's often stamped 'TUBELESS' or 'TUBE TYPE' — and check your owner's manual. This matters more than anything else in this guide, because the two types are repaired in completely different ways: a tubeless puncture is often a ten-minute roadside fix, while a tube puncture means taking the wheel off.
Can you plug a tubeless motorcycle tire and keep riding on it?
Yes, for a puncture in the tread, within limits — and treat it as a temporary repair, not a permanent one. A tread puncture up to about 6 mm (1/4 inch), cleaned and plugged properly, will usually get you home or to a tire shop safely if you keep your speed down. But a plug is a get-you-there fix: the durable repair is a proper internal patch-plug fitted from inside the tire by a shop, and many tire makers consider an external plug a temporary measure only. Ride to the nearest place you can get it inspected or replaced rather than treating a plugged tire as good as new.
When should you NOT repair a motorcycle tire?
Never repair a puncture in the sidewall or the tire's shoulder — only the central tread area (roughly the middle 75% of the tire) can be safely repaired. The sidewall flexes constantly and carries the structural cords; a plug won't hold there and reaming the hole permanently weakens the casing, risking a sudden blowout. Also stop if the hole is larger than about 6 mm (1/4 inch), if there's a cut, gash, or tear rather than a clean puncture, if there are multiple close-together holes, if the tire ran flat and is damaged inside, or if the tread is worn out. In any of those cases the tire is done — get it recovered or replaced, don't gamble on a repair that can fail at speed.
CO2 cartridges or a mini compressor for reinflating a motorcycle tire?
Both work, and they trade off against each other. CO2 cartridges are tiny and fast, but each one holds a fixed, limited amount of gas — a large adventure tire can swallow several to reach pressure, and once they're used, they're gone. A small 12V compressor is slower and bulkier, but it runs off the bike's battery and never runs out, so you can reinflate again and again. For short trips or as a backup, CO2 is fine; for long, remote riding where a second puncture is a real possibility, most riders carry a compressor. If you use CO2, carry more cartridges than you think you'll need.
Do tire sealants like Slime actually work on motorcycles?
They can seal small tread punctures, but opinions among riders and tire makers are genuinely divided, so weigh the trade-offs. A pre-fitted sealant can plug a pinhole automatically and keep you rolling, which is appealing on a long trip. The downsides: it can throw off wheel balance, it makes a mess that complicates a proper repair later, it does nothing for a large hole or a sidewall cut, and some tire manufacturers advise against it or say it voids repairability. It's a personal call rather than a clear yes — plenty of experienced riders rely on a plug kit and compressor instead, which fix the puncture directly rather than hoping a sealant catches it.