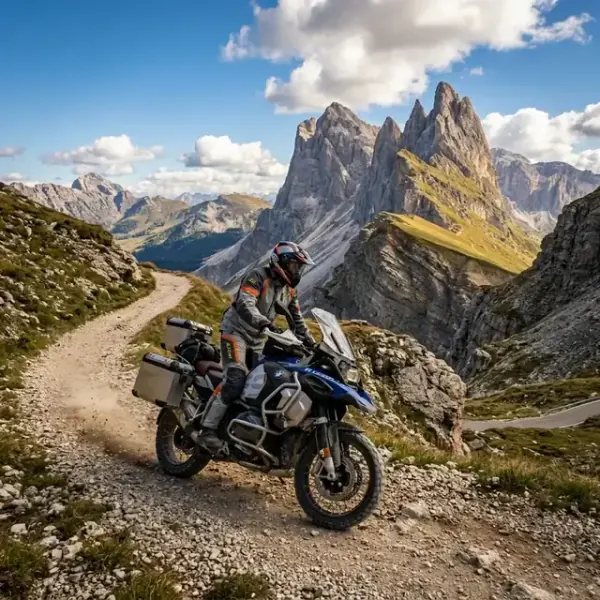
The Trans Euro Trail looks simple on a map. A single coloured line snakes from the North Cape of Norway to the southern coast of Spain, threading through more than thirty countries on dirt, gravel, and forgotten farm tracks. The reality on the ground is more demanding than the map suggests, and the gap between expectation and trail is where most first-time riders get into trouble.
This guide is a practical introduction to the trans euro trail for beginners — what the TET actually is, who it suits, how to prepare the bike, what to pack, and the unwritten rules that keep the network open for the riders who come after.
Introduction: What the TET Actually Is
The Trans Euro Trail is not a single trail. It is a stitched network of existing public tracks, forest roads, byways, and unpaved rights-of-way, connected into a continuous adventure motorcycle route by a community of volunteer “linesmen” — one per country. Each linesman maps the legal off-road sections in their country, publishes the GPX files for free, and updates the route as conditions change.
The current network spans more than 80,000 kilometres across over 30 European countries. There is no entry gate, no fee, and no registration. Riders download the GPX files for the countries they plan to ride and follow them.
It is also not a race. There is no leaderboard, no recorded time, no finishing certificate. Riders who treat the TET as a speed challenge tend to miss the point and damage the trail’s standing with local authorities. The surest way to get sections permanently closed.
The TET is a slow, navigation-heavy form of motorcycle travel. Average daily distances of 150 to 250 kilometres on TET tracks are typical, compared to 500+ kilometres a rider might cover on the same day on paved roads. The terrain dictates the pace, not the schedule.
Who the TET Is Actually For
The most common mistake first-time TET riders make is underestimating the terrain. The map shows a friendly orange line. The line on the ground is sometimes a graded gravel road and sometimes a 25% rocky climb with bowling-ball-sized loose stones, a deep mud bog, or a sand wash a hundred metres wide.
Beginners read forum reports from northern Europe — Netherlands, Germany, Denmark, and assume the rest of the network is similar. It is not. The southern and Balkan sections include genuine adventure terrain that demands real off-road skill and a bike the rider can pick up alone after a drop.
The recommended minimum foundation for a TET section is two years of regular off-road riding, with concrete practice in four specific terrain types. Loose gravel descents on a fully loaded bike. Sand riding at speed, where the technique is opposite to road instinct. Mud with the bike skating sideways under power. Rocky technical climbs that require standing on the pegs and choosing a clean line.
Riders without that background should take a dedicated adventure-riding course before the trip — a two or three day off-road school with instructors will compress months of unsupervised practice into a structured weekend. Course costs of €400 to €800 are a small fraction of what a remote rescue or a hospital visit will cost on a poorly prepared first attempt.
For absolute beginners committed to the TET, the realistic entry strategy is to start with the easiest sections (Netherlands, northern Germany, Denmark) where the terrain is mostly forest gravel and the risk of remote breakdown is low. Build experience over multiple trips before attempting Romania, Albania, or the high Alps.
Choosing the Right Bike
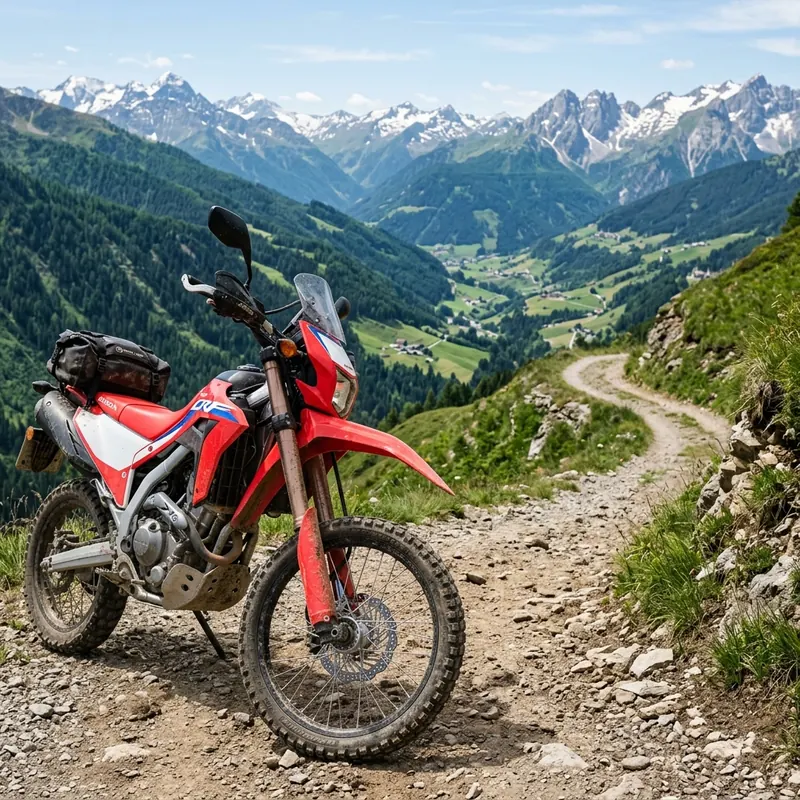
Bike choice on the TET is one of the most discussed and most misunderstood topics in adventure riding. The short answer for beginners: weight matters far more than power.
A 260 kg BMW R 1250 GS with full panniers and a full tank pushes 320 kg total. Picking that bike up alone on a steep loose-rock climb, after a drop at low speed, is difficult. A 205 kg Yamaha Ténéré 700 in the same scenario weighs roughly 250 kg loaded — picking it up is hard but achievable solo. A 150 kg Honda CRF300L Rally is trivial to recover.
Heavy flagship ADVs (R1250GS, Africa Twin 1100, KTM 1290 Super Adventure) work on the TET in the hands of experienced riders. For a best motorcycle for tet answer aimed at beginners, lightweight middleweight bikes are the clear recommendation.
The strong middle-ground choices sit between 180 and 220 kg wet weight. The Yamaha Ténéré 700, Husqvarna Norden 901, KTM 890 Adventure R, and Aprilia Tuareg 660 all fit the bracket. Each carries enough fuel for 300+ kilometre stages, makes 70-110 horsepower (more than enough), and remains recoverable solo on technical terrain.
Smaller options widen the entry point further. The Honda CRF300L Rally, KTM 390 Adventure, Royal Enfield Himalayan, and Suzuki DR-Z400 are all real TET-capable bikes in the 140-165 kg range. They sacrifice highway comfort and luggage capacity for unmatched off-road agility.
Crash Protection Is Not Optional
A bike that arrives at the TET start line without proper protection will not finish the first country intact. The minimum protection package has four components: an aluminium or steel skid plate covering the engine cases and oil filter, handguard protectors (Barkbusters or equivalent) shielding the levers from drop damage, a radiator guard preventing rocks from puncturing fins, and bar end protectors to stop bar tip scuffs.
Total weight of full protection is roughly 1.5 to 2 kg. The cost is typically €300 to €600 for the complete set. A single low-side without protection often produces damage exceeding that figure in one repair bill.
Tyre Choice
Tyre selection is the single largest performance variable on the TET. Pure road tyres (touring or sport-touring compounds) are dangerous on loose surfaces and will puncture on the rocky sections within the first country.
The minimum recommended specification is a 50/50 dual-sport tyre — Continental TKC70, Mitas E-07, Heidenau K60 Scout, or Michelin Anakee Adventure. These tyres compromise on both surfaces but cover the full TET without changes. For riders willing to fit knobbies (TKC80, Mitas E-09, Motoz Tractionator) before technical sections and swap back for highway transit, the off-road performance gain is significant.
Disclosure: some links below are affiliate links. If you buy through them we may earn a small commission at no extra cost to you.
Pre-Departure Bike Preparation Checklist
Bike preparation at home is the cheapest insurance on a TET trip. Every item in this list takes minutes to verify in a garage and prevents a roadside problem that can take hours to resolve in the middle of nowhere.
- Knobby or 50/50 tyres fitted and seated tubeless
- Skid plate installed (800 g)
- Handguard protectors Barkbusters or equivalent (350 g)
- Radiator guard fitted (200 g)
- Spare levers clutch and brake pair (80 g)
- Chain master links x2 (30 g)
- Full fluid check oil coolant brake fluid
A note on the spare levers: they ride in the tool pannier, not on the bike. A snapped clutch lever 60 kilometres from a paved road is a trip-ending failure without a spare. With one in the pannier, it is a 10 minute roadside swap. The overlanding tool kit checklist covers the rest of the spares that turn a breakdown into a delay.
The pre-departure inspection extends beyond this list. Bearings (wheel, swingarm, head), chain wear, brake pad thickness, and electrical connectors all benefit from a slow, deliberate check the week before the trip. Anything marginal at home will become a real problem on washboard surfaces in central Romania.
Navigation and Offline Maps
The TET is delivered as GPX route files, one per country. The files are hosted on transeurotrail.org and updated regularly as routes change — landowner disputes, seasonal closures, and newly opened legal sections all trigger revisions. The most important habit a TET rider can build is downloading the latest GPX file for the country before each border crossing.
Offline navigation is non-negotiable, and which app you choose matters more than riders expect — the offline navigation apps roundup compares what each one actually keeps on the phone. Cell coverage on TET tracks ranges from spotty to absent, especially in mountain sections of Romania, Albania, the Pyrenees, and northern Scandinavia. Phone-based navigation that depends on streaming map tiles will fail within the first technical day.
Three offline GPS solutions cover the majority of TET riders. OsmAnd offers full offline OpenStreetMap data with GPX import, available for Android and iOS. Gaia GPS provides high-resolution topographic layers (paid subscription) with strong route-following features. GPX Viewer is a lightweight option for riders who only need to follow a published track.
For dedicated motorcycle GPS units, the Garmin Zumo XT2 remains the gold standard. The glove-friendly transflective screen reads in direct sunlight, the housing survives rain and dust, and offline maps include detailed Europe coverage. The trade-off is cost; roughly €600 for the unit and required mount.
Battery management deserves planning. A phone running offline maps with the screen on consumes roughly 8-15% battery per hour. A 6 to 8 hour riding day will drain most phones twice over. A waterproof 12V USB charger wired to the bike’s battery, combined with a vibration-rated phone mount (RAM, SP Connect, or Quad Lock), solves the problem permanently.
Check Garmin Zumo XT2 on Amazon →
TET Packing Checklist
Luggage capacity on a TET trip is intentionally limited. Soft bags compress when half-empty, slide off rocks instead of bending the subframe, and weigh a third as much as hard panniers. For a beginner-friendly tet ride guide, soft luggage is the safer default.
- Dry bag tail pack 30-40L (1.2 kg)
- Soft pannier bags pair (2.5 kg)
- First aid kit with space blanket (350 g)
- Offline GPS device or protected mount (400 g)
- Universal cable repair kit (100 g)
- Tyre plug kit with CO2 cartridges x3 (180 g)
- Lightweight shelter tarp or bivy (600 g)
- Water filter Sawyer Squeeze or similar (90 g)
The cable repair kit deserves note. A universal clutch and throttle cable repair kit allows roadside splicing of a snapped inner cable, restoring function in 20 minutes. Replacement cables specific to the bike take days to source in remote regions; a generic repair kit covers any cable on the bike.
The CO2 cartridges complement the 12V compressor mentioned earlier. CO2 is faster for a single tyre inflation and works when the bike’s electrical system has failed. Three 16 g cartridges inflate one motorcycle tyre to riding pressure. The compressor remains the primary tool; CO2 is the backup.
Shop Kriega Dry Bags on Amazon →
Accommodation: Wild Camp or Guest House
The TET passes through countries with very different wild camping laws, and ignoring them creates real legal and trail-access problems. A rough country-by-country guide for wild camping legality is essential pre-trip reading.
Wild camping is broadly tolerated or legal in Scandinavia (Norway, Sweden, Finland under “allemansrätten” right-to-roam laws), Scotland, and most rural areas of the Balkans (Albania, Bosnia, Montenegro, Serbia). The rule across these regions is leave-no-trace, no fires in restricted months, and avoid private fields and gardens.
Wild camping is restricted or illegal in Germany, France, Italy, Spain, Portugal, Netherlands, and Belgium without landowner permission. Enforcement varies widely — remote forest tracks rarely see patrols, while popular spots near beaches and tourist routes do. Riders should plan for paid campsites or guest houses in these countries.
The lightweight strategy for preparing for trans euro trail trips is a guest house and pension network combined with occasional wild camps. Booking pensions in eastern Europe runs €15 to €35 per night and removes the need for full camping gear. The trade-off is some flexibility — guest house locations dictate the day’s endpoint, while a wild camp allows finishing the day wherever the trail ends.
Two apps make accommodation finding dramatically easier. iOverlander is a community-sourced database of verified camp spots, water sources, mechanics, and overland-friendly accommodation, with offline functionality. Park4Night focuses on motorhomes and overlanding but covers many motorcycle-friendly spots, especially in western Europe.
Shop Lightweight Tarps on Amazon →
The TET Code of Conduct
The TET exists because volunteer linesmen negotiated access with landowners, forestry departments, and local authorities. That access is conditional. Riders who break the rules close sections; sometimes permanently; for everyone who follows.
Leave every gate exactly as found. A gate left open releases livestock and ends the agreement that lets riders cross that land. A gate left closed when it was open turns the rider into a thief in the eyes of the farmer. The rule is simple: touch nothing that was not yours to touch.
Do not ride around obstacles. If a fallen tree, mudslide, or washout blocks the trail, the correct response is to walk the bike through, lift it over, or turn around. Cutting a new path around the obstacle widens the trail, damages adjacent vegetation, and gives the landowner grounds to revoke access.
Respect noise limits near villages. Stock exhausts are required on most TET sections. Aftermarket loud exhausts attract complaints, complaints attract authorities, and authorities attract closures. A quiet bike is welcome where a loud one is not.
Leave no trace at camps. Pack out every wrapper, every food scrap, every cigarette butt. The bays, forest clearings, and mountain pastures that host wild camps stay open to riders only because previous riders left them clean.
Report closures to the country linesman. The contact email for each country’s linesman is on transeurotrail.org. A blocked or closed section reported promptly lets the route get re-mapped or re-negotiated. A silent closure leaves the next rider stranded.
Conclusion
The TET rewards preparation and punishes shortcuts. A rider who arrives with the right bike, the right gear, the right skills, and the right attitude finds the most rewarding motorcycle adventure available in Europe. A rider who arrives without those four elements often turns around in the first country, sometimes injured, occasionally with a broken bike that takes weeks to recover.
The checklists in this guide are the starting point, not the destination. Every rider’s TET kit refines over multiple trips as gear proves itself or fails to. The constants are bike preparation, offline navigation, respect for the network, and an honest assessment of the rider’s own skill level against the terrain ahead.
The trail will be there next year. So will the year after. The best first TET section is the one a beginner finishes safely, intact, and ready for the next one.
If you’re weighing the TET against Europe’s paved classics, or thinking about mixing both into one trip, our ultimate Europe adventure motorcycle routes guide covers how the trail sits alongside the Alps, the Pyrenees, the fjords and the coastal routes.
Disclosure: Some of the links in this article are affiliate links. If you buy gear through them, we may earn a small commission at no extra cost to you. It helps fund the research that makes these independent guides possible — every recommendation here is based on published specifications and long-term rider reports from overland routes.
A note on the figures: prices and costs on this page are indicative as of May 2026, not quotes. Retail prices, fares, fees and premiums all move — check the current figure before you rely on it.
Frequently Asked Questions
Is the TET free to ride?
Yes. The Trans Euro Trail is a free, volunteer-maintained network of GPX route files distributed through transeurotrail.org. There are no entry fees, no permits, and no registration. Riders are expected to respect the volunteer effort by following the published routes, reporting closed sections back to the country linesman, and obeying the TET code of conduct. The only costs are fuel, food, accommodation, ferry crossings between countries, and gear.
What is the hardest TET country?
Romania and Albania are consistently named as the most technically demanding sections. Romanian Carpathian crossings feature long rocky climbs, deep ruts, and exposed mountain shelves at altitude. Albanian sections combine rough mountain tracks with unmaintained surfaces, river crossings, and remote terrain where recovery is difficult. Greece and Bulgaria sit one tier below — challenging but more forgiving. Northern European countries (Netherlands, Germany, Denmark) are mostly gravel forest roads and double-track, suitable for fully loaded heavy ADV bikes.
Can a beginner ride the TET?
A beginner with no off-road experience should not attempt full TET sections solo. The minimum recommended foundation is two years of regular off-road riding, including practice with sand, mud, loose rocks, and steep descents. Riders without that background should take a dedicated adventure-riding course before the trip, then start with northern European sections (Netherlands, Germany) which are predominantly gravel road and forest track. The southern and Balkan sections demand real skill regardless of bike choice.
What bike is best for the TET?
Lightweight middleweight adventure and dual-sport bikes consistently outperform heavy flagship ADVs on the TET. The Yamaha Ténéré 700, Husqvarna Norden 901, KTM 890 Adventure R, and Honda CRF300L Rally are popular choices, spanning roughly 150 kg for the CRF300L Rally up to a little over 200 kg for the bigger twins. Big bikes like the BMW R 1250 GS and Honda Africa Twin 1100 can complete most of the TET but require significantly more rider skill on technical sections, and a single drop on a remote climb is much harder to recover with a 260 kg bike than a 200 kg one.
How long does the full TET take?
The full TET runs roughly 80,000 kilometres across more than 30 European countries. Riding the entire network end-to-end without breaks would take roughly six to nine months at a sustainable pace, allowing for weather days, mechanical issues, and rest stops. Most riders cover the TET over multiple shorter trips of two to four weeks, each focused on one or two countries. A single-country section like Romania or Portugal typically takes 10 to 14 days at a comfortable pace.