
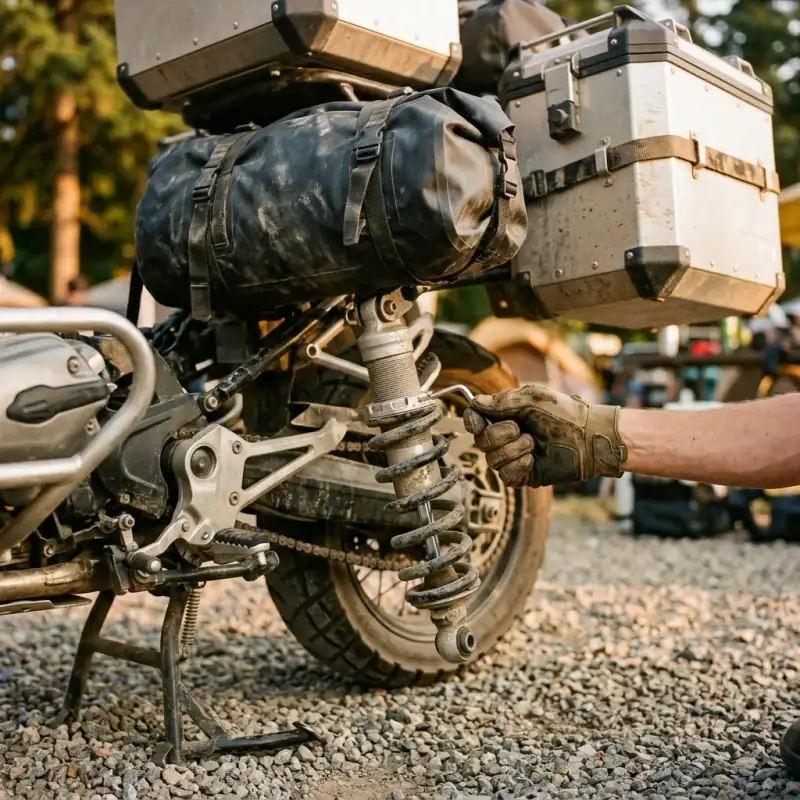
There’s a three-part sequence to loading an adventure bike, and almost everybody does two parts of it.
Part one is weight: what the bike is rated to carry, which we went through in the payload chart. Part two is tyre pressure, and the manuals have plenty to say about that too — some makers publish a specific loaded figure, which we covered in the tyre pressure guide.
Part three is the suspension, and it’s the one that gets skipped. Which is odd, because it’s the only one of the three where the manufacturer has printed a table telling you exactly what to do, and the only one you can get wrong for two thousand kilometres without noticing you’ve done it.
We read five owner’s manuals to see what makers actually publish. They’re more specific than we expected — one of them converts kilograms directly into turns of an adjuster.
What Preload Does, and the Thing It Doesn’t Do
The most common misunderstanding about preload is that it makes the suspension harder. It doesn’t, and the distinction is the key to using it correctly.
A spring has a rate — so many newtons per millimetre of compression — and winding preload into it doesn’t change that rate one bit. What preload changes is the starting point: how far into its travel the suspension already sits before you’ve hit anything.
Load a bike with 40 kg of camping kit and a passenger and the rear settles deep into its stroke. Nothing about the spring has changed, but the amount of travel left above the bump — the part that does the actual work — has shrunk. Add preload and the bike comes back up to roughly where it started, with its travel back and its geometry roughly back where the designers put it.
That’s why preload is the right adjustment for luggage and the wrong adjustment for “the ride feels harsh”. Harshness lives in damping and spring rate. Sagging under load lives in preload.
KTM puts it plainly in the 890 Adventure R manual: the spring preload defines the initial state of the spring, and the best setting is the one matched to the weight of the rider plus any luggage and passenger, giving the ideal compromise between handling and stability.
BMW is blunter still. Its manual states that it is essential to set the rear spring preload to suit the load being carried.
What Five Manufacturers Actually Publish
Here is where it gets specific. These aren’t vague instructions to “adjust as required” — they’re numbers.
BMW turns kilograms into turns
The R 1300 GS rider’s manual gives three baseline settings for the rear spring preload, using the tool from the on-board kit on a hex adjuster. One caveat before you go looking for the adjuster: this table is from the manual’s section for bikes without Dynamic Suspension Adjustment. If your GS has DSA — and a lot of them do — preload is handled electronically from the menu and there’s no hex to turn. The numbers below are still the clearest published illustration of how much adjustment a loaded bike actually needs; they just aren’t the procedure for your bike.
| Load | Setting |
|---|---|
| Full tank, rider approx. 85 kg (solo) | Wind the hex fully counter-clockwise — minimum preload |
| One-up with luggage, approx. 105 kg | From fully counter-clockwise, back off 14 turns clockwise |
| Two-up with luggage, approx. 165 kg | From fully counter-clockwise, back off 30 turns clockwise |
And then the line that makes the whole table portable:
If the load differs from the base settings, increase spring preload two full turns for every 10 kg of extra weight.
That is a manufacturer publishing a linear conversion from mass to adjuster position. Weigh your kit — which our payload guide will nag you into doing anyway — and you can compute your setting rather than guess it.
Note also how large the range is. Thirty turns between solo and fully loaded two-up. If you’ve been riding a loaded GS on the solo setting, you haven’t been slightly off; you’ve been at one end of a very long scale.
BMW’s procedure note: adjust only with the motorcycle at a standstill, on level, firm ground, on its stand. Not while riding, which the manual warns against explicitly.
KTM publishes a whole “full payload” column
The 890 Adventure R manual gives guideline settings in four columns — Comfort, Standard, Sport and Full payload — for fork compression damping, fork rebound damping, fork spring preload and the rear shock spring preload.
The rear shock preload column is the one to look at:
| Setting | Rear shock spring preload |
|---|---|
| Comfort | 4 turns |
| Standard | 4 turns |
| Sport | 4 turns |
| Full payload | 10 turns |
Comfort, Standard and Sport all sit at 4 turns. Loading the bike is the only thing that moves the number — and it more than doubles it.
The front tells a subtler story. KTM’s fork spring preload guideline is +0 for Comfort, Standard and Sport, and +3 for full payload, on adjusters whose T-grips click audibly at each numbered position. So the front gets some help, but nothing like the rear’s jump — which is exactly what you’d expect, because adventure luggage lives behind the rider.
KTM also publishes Comfort/Standard/Sport/Full payload click counts for fork compression and rebound damping. We’re not reprinting those, and you should know why: the manual gives different values for the standard and the Rally fork, and our extraction of the tables couldn’t reliably tell which column belonged to which fork. Publishing a damping figure against the wrong fork is a genuinely bad outcome, so we’ve left it. Open section 12 of your own manual — the tables are there, split by fork type, and the split exists for a reason.
One warning from the same page, worth repeating because it applies to every bike here: changes to the suspension setting can seriously alter handling, so ride gently at first to get the feel of the new behaviour.
Yamaha gives a scale with a standard in the middle
The Ténéré 700’s rear shock is adjusted with a knob, and the manual publishes the full range: spring preload 0 turns soft, 10 standard, 24 hard, with compression damping running 22 clicks soft, 11 standard, 0 hard from the start position.
Nothing in there is labelled “with luggage”, so the T7 rider has to interpret rather than look up. But the shape of the scale is the useful information: standard sits at 10 of a possible 24 turns, which means there’s more than half the adjustment range still available above the setting your bike left the factory on. Riders who assume their preload is “already about right” for a loaded trip are usually sitting at 10 and unaware there’s a 24.
Yamaha adds the obvious safety note: never go beyond the maximum or minimum adjustment positions.
Royal Enfield counts notches
The Himalayan 450’s manual specifies preload by notch position on a stepped collar — the third notch for a rider alone, the final notch when the bike is fully loaded. It’s the crudest system here and arguably the most usable: two positions, no arithmetic, no tools worth losing.
Triumph moved it to the dashboard
On the Tiger 900 GT Pro, preload is electronic — a PRELOAD menu on the instrument display that adjusts the parameters to suit rider preference and conditions. The GT keeps a mechanical rear spring preload adjuster on the swingarm.
This is where a lot of the market is going, and it’s genuinely better for touring: the adjustment you’ll actually make is the one you can make at a fuel stop without a toolkit. The catch is that it hides the scale — you don’t see how far you’ve moved, or how much is left.
Sag: The Measurement, and an Honest Caveat
Everything above is a manufacturer shortcut. Sag is the underlying measurement those shortcuts approximate, and it’s what you fall back on when your manual gives you nothing useful.
How to measure it, with the bike loaded exactly as you’ll ride it:
- Fully extended. Get the rear wheel off the ground (centre stand, or a helper lifting the tail) and measure from the rear axle to a fixed point vertically above it — a mark on the mudguard or a bodywork seam. Write it down.
- Free sag. Bike on both wheels, upright, nobody aboard. Measure again. The difference is free (static) sag — how far it settles under its own weight.
- Rider sag. You aboard in full riding kit, feet on the pegs, someone holding the bike upright. Bounce the suspension gently and let it settle. Measure again. The difference from step 1 is rider sag.
- Adjust and repeat. Add preload to reduce sag, wind it off to increase it, and re-measure — don’t calculate what you think it should be.
What to aim for, and here’s where we’re going to be careful. Öhlins’ own shock owner’s manual recommends free sag of 25±5 mm front and rear, and a ride height at the rear of about 30% of total stroke, with 60±5 mm at the front — while stating that recommended settings in the mounting instructions for your specific shock take precedence.
That caveat isn’t boilerplate. Sag targets differ between suspension manufacturers, between road and off-road bias, and between models, and Öhlins publishes different figures across its own product families. Anyone who tells you there is one correct sag percentage for all adventure bikes is oversimplifying.
So the order of preference is: your bike manual’s load setting first, your shock manufacturer’s figure second, a generic percentage a distant third. BMW’s 14-and-30-turns table beats a rule of thumb, because BMW measured it on that bike.
Getting the Balance Right, Not Just the Rear
Almost all the load goes on the rear, so almost all the adjustment goes there — but doing only the rear creates its own problem.
Wind in a lot of rear preload and you raise the back of the bike. That steepens the steering head, quickens the steering, and shifts weight forward. Do it in isolation and a loaded bike can feel nervous at speed even though you’ve “fixed” the sag.
This is why KTM adds +3 to the fork preload in its full-payload column rather than leaving the front alone, and it’s why the front damping columns exist at all. If your bike offers front adjustment and you’re touring heavy, use a little of it.
The symptoms are worth learning to read:
- Rear bottoming on dips, wallowing in fast corners, the bike squatting under acceleration: not enough rear preload.
- Rear feels harsh over small bumps, rear wheel skipping on rough surfaces: too much preload, or too much compression damping.
- Front feels vague and light, bike wants to run wide: rear too high relative to the front, common after a big preload increase.
- Front dives hard under braking on a loaded bike: more front preload, or more compression damping if you have it.
None of that is a substitute for measuring. All of it is useful when you’re 400 km into a trip with a tape measure you don’t have.
The Ten-Minute Routine Before a Loaded Trip
- Pack the bike exactly as you’ll ride it. Full tank, all luggage, passenger if there’ll be one. Setting suspension for a load you’re guessing at is the mistake this whole article exists to prevent.
- Find your manual’s load setting. Look in the chassis/adjustment section, not the specifications table. Search terms that work: “spring preload”, “basic setting”, “full payload”, “with passenger”.
- Set the rear. Bike on the stand, level firm ground, adjuster wound to the manual’s figure. Count turns out loud; it’s embarrassingly easy to lose track at turn nineteen.
- Give the front a little. If your bike has fork preload and you’re near the limit of your load, use it — a fraction of what you added at the back.
- Measure rider sag if you have ten more minutes. Loaded, in kit. Write the number in your phone so next year you’re not starting from scratch.
- Ride gently for the first few kilometres. KTM says it in the manual, and it’s right — the bike will feel different, and finding out how different at speed on an unfamiliar road is the wrong time.
- Reset when you unload. A solo bike on two-up settings rides high, harsh and skittish, and it’s the half of this job everyone forgets on the way home.
What This Doesn’t Fix
Correct preload transforms how a loaded bike behaves. It does not change what it’s allowed to carry.
The manufacturer’s maximum load reflects the frame, the subframe, the wheels, the brakes, the tyre load ratings and the axle limits — KTM publishes separate maximum front and rear axle loads alongside its total, which tells you the number was never only about springs. Wind in all the preload you like and every one of those limits sits exactly where it did.
There’s also a genuine trap here: a well-set-up overloaded bike feels fine. The sag is right, the corners are stable, nothing bottoms out, so the feedback that would otherwise tell you you’re too heavy has been engineered away. That’s the same equipment problem we hit with tyres, where correct pressure masks an over-loaded carcass right up until it doesn’t.
If the arithmetic in the payload chart says you’re over, suspension is not the answer. Packing less is.
The Bottom Line
Five manuals, five different systems, one consistent message: the manufacturer expects you to change the suspension when you load the bike, and has told you by how much.
BMW gives you thirty turns of range and a conversion rule of two turns per 10 kg. KTM gives you a whole column headed “full payload” and more than doubles the rear preload to fill it. Yamaha shows you a 24-turn scale you’ve probably never left the middle of. Royal Enfield says “final notch”. Triumph put it in a menu.
The tool is in the seat compartment on most of these bikes. The instruction is in a section of the manual you’ve never opened. And the difference it makes to a fully loaded bike on a bad road is larger than most of the accessories people buy instead.
Go and read the chassis section before your next loaded trip. Then read it again on the way home, because you’ll need to put it back.
Frequently Asked Questions
How much preload should I add when the bike is loaded?
Your manual very likely tells you, in specific numbers. BMW's R 1300 GS rider's manual gives three baseline settings for the rear spring preload — fully wound off for a solo rider of about 85 kg with a full tank, 14 turns clockwise for one-up with luggage at around 105 kg, and 30 turns for two-up with luggage at around 165 kg — and then a conversion rule for anything in between: increase spring preload two full turns for every 10 kg of extra weight. KTM's 890 Adventure R manual publishes a 'full payload' column that takes the rear shock preload adjuster from 4 turns at its Standard setting to 10 turns. Yamaha's Ténéré 700 uses a 0 to 24 turn scale with 10 as standard. The specific numbers only apply to those bikes, but almost every adventure bike manual has an equivalent, and most riders have never looked.
Does adding preload make the suspension stiffer?
Not in the way most people mean. Preload doesn't change the spring rate — a spring wound tighter still resists compression at exactly the same rate per millimetre. What preload changes is where in its travel the bike sits under a given load, which is why it's the correct adjustment for luggage and a passenger and the wrong adjustment for 'the ride feels too soft over bumps'. Adding preload to a loaded bike restores the suspension travel you lost when you packed it, so there's stroke left to absorb a pothole instead of the shock running out of movement and topping the bump straight through to the chassis. If you genuinely need a different rate, that's a spring change, not an adjuster.
What is sag and what should it be on an adventure bike?
Sag is how far the suspension compresses under weight — free or static sag under the bike's own weight, and rider sag with you aboard in full kit. Öhlins' own shock owner's manual gives recommended figures of 25±5 mm free sag front and rear, with ride height at the rear set to about 30% of total stroke and 60±5 mm at the front, while noting that the mounting instructions for your specific shock take precedence. That last caveat matters: sag targets vary between manufacturers and even between models from the same manufacturer, and several bike makers skip sag entirely and publish turn counts instead. If your motorcycle's manual gives you a load setting, use that first — it's the number the people who built the bike validated.
Do I need special tools to set suspension for touring?
Usually not. BMW's manual has you use the tool from the on-board toolkit on a hex adjuster. Yamaha's Ténéré 700 uses a knob you turn by hand. KTM's fork preload adjusters are T-grips that engage with an audible click at each numbered position. Royal Enfield's Himalayan uses a stepped collar with notches. The exceptions are older or budget bikes with a C-spanner collar, which is genuinely awkward at the roadside, and electronically adjusted bikes like the Tiger 900 GT Pro where preload is a menu item on the dash. Measuring sag needs a tape measure and a friend. Nothing here requires you to buy anything, which is why this article has no products in it.
Can suspension adjustment let me carry more weight?
No, and it's worth being clear about that. Correct preload makes a loaded bike behave far better — it restores usable travel, keeps the geometry closer to where the designers put it, and stops the shock bottoming on every dip. What it doesn't do is raise the manufacturer's maximum load, which is set by the whole system: frame, subframe, wheels, brakes, tyre load ratings and axle limits. KTM publishes separate maximum axle loads alongside its total for exactly this reason. If you're over the published payload, better suspension makes the problem feel better while leaving it entirely intact.