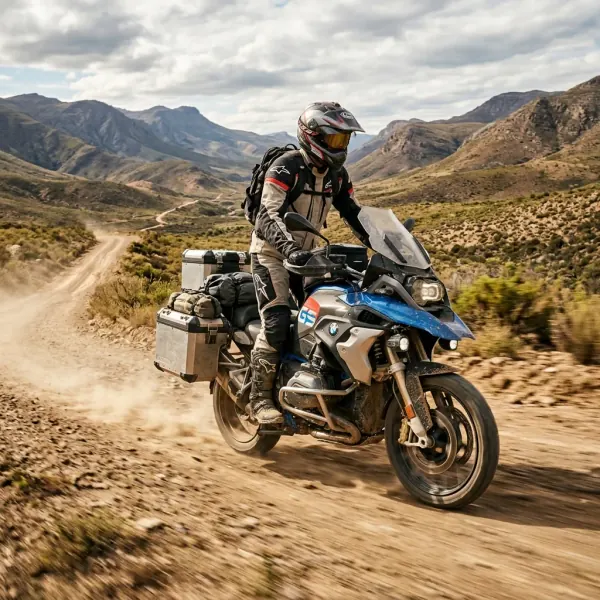
The first time I rode my CFMOTO 250NK fully loaded onto a dirt track, I crashed within 4 kilometers. Soft sand on a forest road outside Bursa. I’d been riding the bike empty for two years and thought I knew it. Loaded with 28 kg of panniers and tail bag, it felt like a different motorcycle — slower to turn, heavier on the front, and aggressive on inputs that I’d been making smoothly when it was empty.
The crash wasn’t dramatic. The front washed out at 25 km/h, I slid into a bush, and the bike landed on its side with a pannier protecting the engine case. But I learned something important in the next 20 minutes — picking up a loaded 250 kg-equivalent rig from a sand pit by yourself, with no help, requires a technique I didn’t have. I figured it out in slow motion that day.
Three seasons later, I’ve ridden loaded bikes on rocky Aegean trails, muddy Black Sea forest tracks, and sand sections of the Trans-Euro Trail. This guide is what I wish someone had walked me through before that first crash. Off-road riding tips for loaded adventure bikes that actually work — not the theoretical advice from rider training schools that nobody applies, but the practical technique that keeps a loaded ADV upright and moving.
Why a Loaded Bike Rides Differently
An ADV bike empty weighs 200-250 kg. Add 30 kg of luggage and the math says you’ve increased mass by 12-15%. The reality feels more like 30%, because the new weight is high (above the seat in tail bag, in panniers on the sides) and behind the center of gravity (most luggage sits behind the rider).
Two things change. First, the center of gravity rises. Higher CG means slower roll response — the bike takes longer to lean and longer to right itself. In tight switchbacks at low speed, this feels tippy and unstable. Second, the rear weight bias increases. More weight on the rear wheel means less weight on the front. Front-tire traction drops. Steering feels light, vague, and floaty.
The bike that turns easily empty understeers loaded. The bike that brakes hard empty pushes the front when loaded. The bike that bounces gently over ruts empty now skips and deflects when loaded. None of this is the bike’s fault — it’s the physics of carrying mass in the wrong places.
The solutions are partly setup (pack heavy stuff low and forward) and partly technique (adapt your inputs). This guide covers both.
Weight Distribution and Setup Before You Ride
The single biggest factor in how a loaded bike handles off-road is where the weight sits. Get this right before you ride and half the problem goes away.
Rule 1: Heavy items go low and forward. Tools, spare tubes, food cans, fuel canister — bottom of the panniers, as close to the bike’s centerline as possible. The lower the weight, the lower the CG. The more forward the weight, the more balanced the front-rear distribution.
Rule 2: The top box stays light or empty for off-road. A 30L top box stuffed with gear can carry 12-15 kg of weight 80 cm above the road. That’s the worst possible place to put weight. For technical riding, move heavy items out of the top box and into the bottom of side panniers. Keep the top box for lightweight bulky stuff — a jacket, a sleeping bag, snacks.
Rule 3: Both panniers weigh roughly the same. A 5 kg difference between left and right pannier creates a constant lean force the bike has to fight. Weigh both panniers before each trip if you can — a small luggage scale at the start of the day pays off all week.
Rule 4: Tire pressure drops 2-4 PSI for dirt. If you run 32/36 PSI on tarmac, drop to 28/32 for gravel, 25/28 for sand or loose surfaces. Lower pressure gives you more contact patch and more grip. Carry a small electric pump (200g, $25) to re-inflate before tarmac sections.
Get these four rules right and you’ve solved most of the loaded-bike problem before you’ve moved an inch.
The Standing Position: Non-Negotiable on Technical Terrain
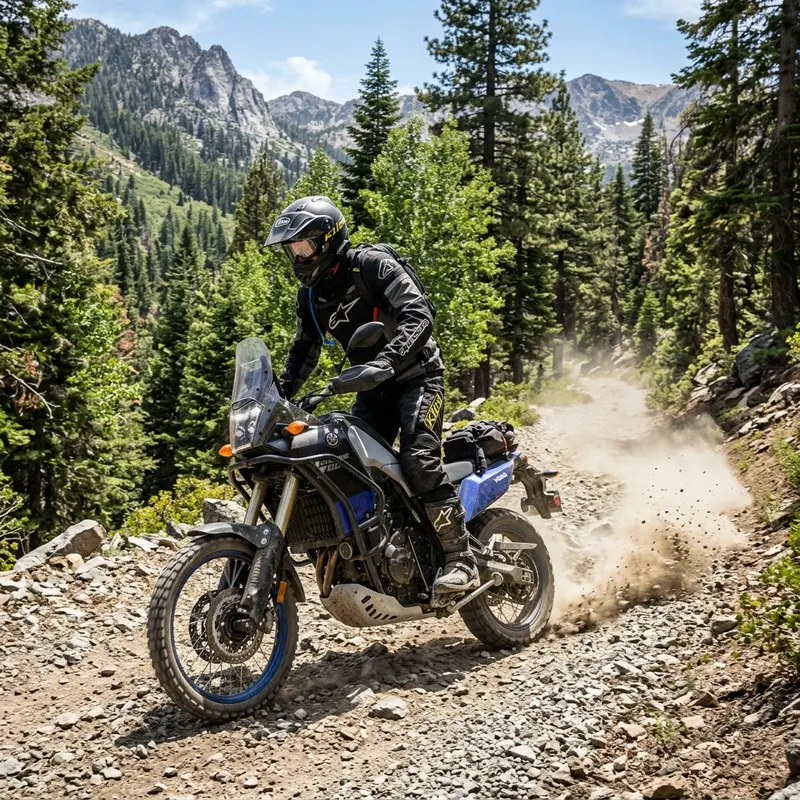
The single technique change that makes the biggest difference on a loaded ADV bike is standing on the pegs. Not just briefly. Continuously, for kilometers at a time, whenever the surface is uncertain.
When you stand on the pegs, three things change for the better.
First, your center of gravity drops. Your feet are on the pegs, 30-40 cm below the seat. The combined rider-plus-bike CG drops by 15-20 cm. The bike feels more planted, more controllable, less likely to tip in slow corners.
Second, the bike can move under you. Sitting, your hips are locked to the seat. When the rear wheel deflects off a rock, the whole bike-and-rider system reacts as one mass. Standing, your hips float above the bike. The bike can deflect, slide, and recover under you while your upper body stays steady.
Third, you steer with your legs instead of your hands. This sounds strange. It works. Push the right peg down with your right leg and the bike leans right. Lighter, more precise, and far less likely to cause front-wheel washout than yanking the handlebars.
The correct standing position:
- Knees gripping the tank lightly (not clamped — light contact)
- Hips slightly back, weight over the pegs
- Elbows up and out, in a “boxer’s guard” position
- Light grip on the bars — handlebar should be able to move under you
- Eyes up, looking 10+ meters ahead
If your back hurts after 20 minutes standing, you’re standing wrong. Standing should be a sustainable position you can hold for hours. The cure is usually relaxing the upper body and trusting the bike more.
Throttle and Braking Technique for Loaded Bikes
A loaded bike amplifies every input. Smooth throttle and braking become more important, not less.
Throttle: Roll on, don’t snap on. A snap of the throttle on a loaded bike on loose ground spins the rear wheel and breaks rear traction. Smooth, progressive throttle application keeps the rear hooked up. On climbs and in soft ground, maintain steady throttle through the section — chopping the throttle mid-climb on sand is the fastest way to bog down.
Front brake: Use less of it than you would empty. Loaded bikes have less front-tire traction available (more weight on the rear, less on the front). Aggressive front braking on dirt loaded is the fastest way to wash out the front wheel. Use front brake gently on dirt, especially when the wheel is even slightly turned.
Rear brake: Use more of it. The loaded rear has more weight on it and more grip available. Trailing the rear brake into corners, locking it briefly to slide the rear around tight turns, using it to control speed on descents — all standard ADV technique that becomes more important when loaded.
Engine braking: Powerful tool on descents. Downshift early before a steep descent and let the engine hold your speed. Riding the brakes for a long descent overheats them and you lose stopping power. Engine braking on the back wheel, combined with light trail braking with the rear, is the right way down a long loose descent.
Surface-Specific Techniques
Sand and Soft Ground
Sand is where most loaded ADV bikes get stuck and dropped. The technique is counterintuitive: more throttle, less braking, light grip, and let the bike move.
Momentum is everything. A loaded ADV bike with enough speed will float on top of sand. Slow down and the front tire digs in. The instinct when the bike starts to wander is to brake and slow further — exactly wrong. Add throttle, weight the rear, and ride through.
Stand on the pegs, weight back, light grip on the bars, eyes 15 meters ahead. Let the front wheel wander — it will. The bike steers with your weight on the pegs and the rear wheel. Don’t fight the bars.
If you get stuck in sand: rocking the bike out is rarely possible loaded. The honest move is to unload one pannier, push the bike out, and reload at the firm ground.
Mud and Slippery Surfaces
Mud is about choosing your line before you’re in it. Avoid ruts if possible — once you’re committed to a rut, you’re following it whether you want to or not. Ride the firmer ground on the side or down the middle ridge.
Throttle smooth, no sudden inputs. Mud rewards momentum like sand but with less grip available. Speed is your friend up to the point where you can’t control direction; then it’s your enemy.
Tires matter more here than technique. A dedicated knobby (TKC80, MotoZ Tractionator) handles mud completely differently from a road-biased ADV tire (TKC70, Anakee Adventure). If your trips include real mud, the right tire is the upgrade that beats any technique improvement.
Rocky and Technical Climbs
Look further ahead. On a rocky climb, the temptation is to stare at the rock 2 meters in front. Your brain finds a line at 2 meters and follows it. The problem is, you commit to that line before you see what’s at 5 meters.
Look 10+ meters ahead. Choose your line for the next 4-5 rocks at once. The bike will follow your eyes through any line you can see and plan. This is the single biggest skill upgrade most ADV riders need.
Stand, weight slightly forward on climbs (to keep the front wheel down), steady throttle, and let the bike pick its way through. Don’t try to muscle a 250 kg loaded bike around a rock — the bike has too much momentum to deflect quickly. Plan the line, ride the line, don’t fight the line.
How to Pick Up a Dropped Loaded Motorcycle
You will drop the bike. Everyone does, even experienced riders, especially when loaded. The skill that matters is picking it up alone in remote places where no help is coming.
The wrong way: standing next to the bike, gripping the handlebars and seat, trying to lift it with your back. A 250 kg loaded bike defeats any reasonable human’s back strength. You hurt yourself.
The right way: use legs and the bike’s geometry.
- Put the bike in gear. This prevents it rolling forward when you start lifting.
- Side stand down. When the bike comes up, it lands on the side stand instead of falling the other direction.
- Squat with your back to the seat. Your butt against the seat, your back facing the bike, your feet on the ground.
- Grip the lower handlebar (the one against the ground) with one hand, and a luggage strap or grab handle near the rear with the other.
- Walk your feet backward while pushing up with your legs.
The bike pivots on its tank and pannier. As you walk backward, the bike rises in a controlled arc. Your legs do the work, your back stays straight. With practice, even a small rider can lift a 250 kg ADV bike in 60 seconds.
Practice this in your garage with the bike empty before you need it in the field.
Pre-Ride Off-Road Checklist
Before you point a loaded bike at dirt, run through these five items. Total weight: zero. Time: 5 minutes. Saves a crash.
- Tyre pressure checked and reduced 2-3 PSI for dirt (0 g)
- Luggage weight distributed low and rearward (0 g)
- Handguards fitted and levers adjusted (0 g)
- Tool kit accessible not buried under gear (0 g)
- Fuel range confirmed for remote section (0 g)
The “tool kit accessible” line matters more than people think. The first time you need to plug a tire on a trail, you don’t want to unload three panniers to find the plug kit. Keep the plug kit, the multi-tool, and the small first aid in the top box or tank bag where they’re reachable without dismantling your load.
For a deeper packing strategy, see the guide on how to pack a motorcycle for a 2-week camping trip. For the full tool kit list, see essential motorcycle tool kit for overlanding.
Internal Connections
This guide pairs with other technique and gear content on Bikes and Bays:
- For the luggage setup that makes loaded off-road riding tolerable, see the Mosko Moto Backcountry 35L review.
- For the trail to actually practice these techniques, see Trans-Euro Trail TET for beginners.
- For the gear that survives loaded off-road riding, see the essential overland tool kit.
FAQ
Five common questions are answered at the top of this page. The short version: pack low and forward, stand on the pegs when terrain gets technical, drop tire pressure 2-4 PSI for dirt, look 10 meters ahead instead of 2, and practice picking up your bike in your garage before you need to in the field.
Whatever route you’re riding, the off-road riding tips for loaded adventure bikes that matter most are the boring ones — setup, position, eye discipline. The exotic technique people obsess about online is downstream of these basics. Get the fundamentals right and the bike rides itself.
Frequently Asked Questions
How much weight is too much for off-road riding?
Most adventure bikes handle 25-30 kg of luggage off-road without major technique compromises. Past 35-40 kg, you'll feel the bike's behavior change noticeably — slower steering response, more momentum to manage, harder to pick up after a drop. The real limit isn't a hard number; it's how the weight is distributed. 30 kg low and centered rides much better than 20 kg high on a top box. Pack heavy items low in the panniers and keep the top box light or empty for any technical riding.
Should I stand on the pegs all the time off-road?
On technical terrain — rocks, ruts, sand, anything where the front wheel might wash or deflect — yes, stand. Standing lowers your center of gravity (your feet are below the seat), lets the bike move under you, and gives you better leverage to control direction with hip and leg input. On smooth gravel or hard-pack at moderate speed, sit. Standing for hours on smooth surfaces is just fatigue. The rule: stand when traction is uncertain, sit when it's not.
What tire pressure should I use off-road on a loaded bike?
Drop 2-4 PSI from your road pressure. If you run 32/36 PSI front/rear on tarmac, drop to 28/32 for gravel and packed dirt, 25/28 for sand and loose surfaces. Lower pressure increases the tire's contact patch and gives you more grip on soft ground. Don't go below 22 PSI on most ADV tires loaded — you risk pinch flats on rocks and the tire can roll off the rim in hard cornering. Re-inflate before you hit pavement again.
Can I really pick up a 250kg loaded bike alone?
Yes, with the right technique. Brute strength doesn't work — the bike weighs more than you. The technique is to use your legs and the bike's geometry. Put the bike in gear with the side stand down to prevent it rolling. Squat with your back to the seat, grip the lower handlebar with one hand and a luggage strap with the other, and walk your feet backward while pushing up with your legs. The bike pivots on its tank and pannier and rises in a controlled arc. With practice, even a small rider can lift a 250kg ADV bike in 60 seconds.
What's the biggest mistake new ADV riders make off-road?
Looking 2 meters in front of the bike instead of 10 meters ahead. The brain finds it natural to focus on the immediate obstacle, but on a loaded ADV bike at speed, by the time you see something at 2 meters you're already committed to a reaction. Look 10 meters ahead and your brain plans the line automatically. The bike follows your eyes. This single habit change does more for your off-road riding than any new piece of gear.