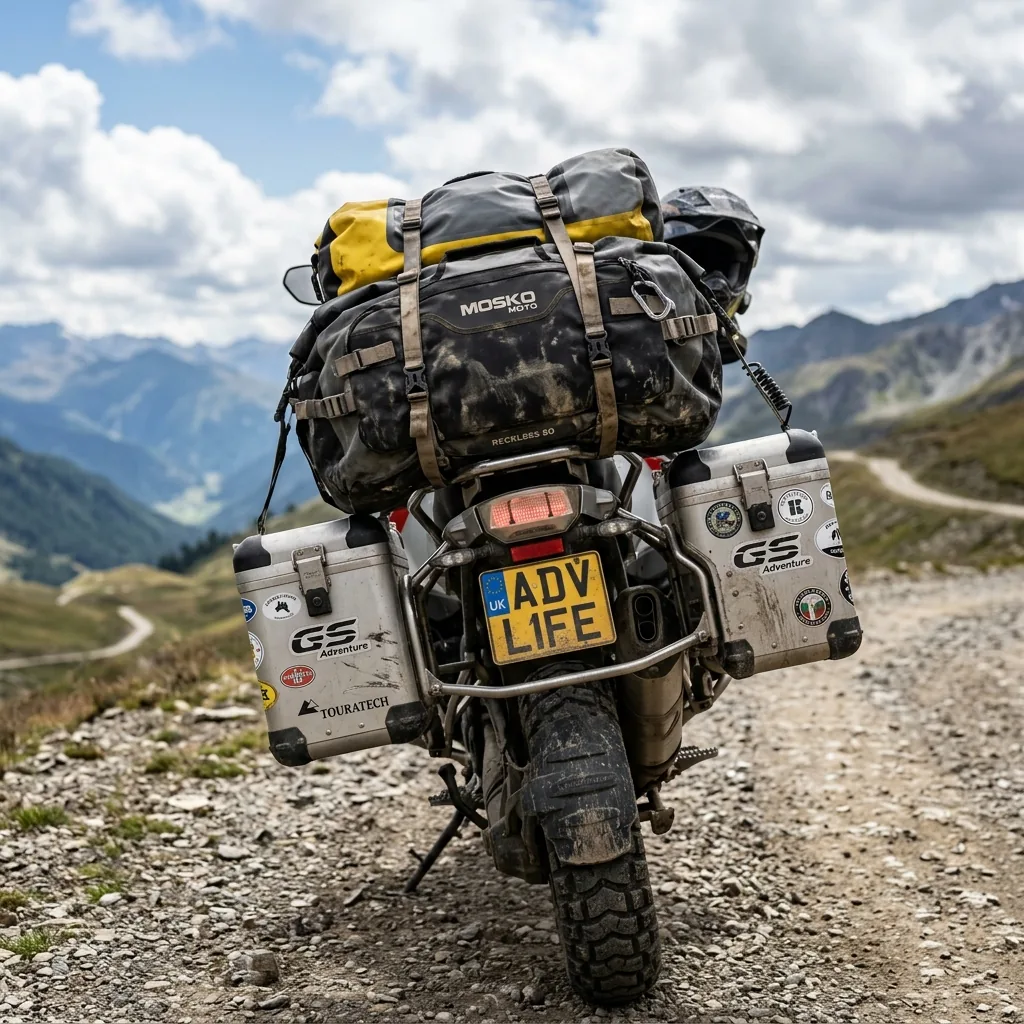
Three years ago I packed for my first long trip the way I packed a backpack for a weekend hike — gear stuffed wherever it fit, the heaviest stuff thrown in last because it was the most annoying to deal with. I rode out of Istanbul with a 6 kg tool roll riding high on the back of the seat in a tail bag, my sleeping bag jammed into the bottom of a side pannier, and my passport in a chest pocket I forgot I’d put it in.
By kilometer 80, the bike felt like a paint shaker. By kilometer 200, I was pulling over every twenty minutes to dig for things. By the end of day one, I’d lost a tent peg out of a strap I hadn’t tightened, and my rear suspension was hammering through corners because the load was too high and too far back. I limped into the first campsite, unpacked everything, and slept on it.
Day two, I repacked the bike from zero. Heavy things low. Things I needed during the ride on top. Sleeping gear in the tail bag because it was bulky but light. The same bike, same gear, totally different machine.
This guide is what I wish someone had walked me through before that first trip. How to pack a motorcycle camping trip for two weeks of self-sufficient travel — the weight distribution, the bag-by-bag layout, and the small mistakes that turn a great trip into a slow-burning misery.
Calculate Your Packing Weight & Balance
Want to see how your gear placement affects handling? Use our interactive packing calculator to lay out your load and get real-time stability alerts before you hit the trail.
Why Weight Distribution Matters More Than You Think
A motorcycle handles well because its center of gravity is low and centered between the wheels. That’s basic. What’s less obvious is how badly even a small amount of poorly-placed weight changes the bike.
Put 5 kg behind the rear axle — on a tail rack or top box — and you’re cantilevering that weight off the end of the swingarm. The lever effect lifts weight off the front wheel. Front-tire traction drops. Steering feels light, vague, almost floaty at speed. In a strong crosswind, the bike starts to weave. Hit a bump under braking and the front can chatter and skip because there’s not enough load on it. Add a panicked grab at the front brake and you’ve earned yourself a tank-slapper.
Put that same 5 kg high on a top box — say, a 30L Givi case stuffed full — and you’ve also raised the center of gravity. Every lean now starts with more inertia to overcome. Slow-speed maneuvers at a gas station feel tippy. Picking the bike up after a low-side off-road takes noticeably more effort, and dropping it again at the same gas station feels imminent.
The good news: distributed correctly, you can carry the same total weight and the bike feels almost stock. Here’s the target layout I aim for on every long trip:
| Luggage Zone | Target Weight | Contents | Why It Goes Here |
|---|---|---|---|
| Low Side Bags (Bottom) | ~60% of luggage weight | Tools, spare tubes, stove, food cans, fuel canister | Lowest center of gravity — bike stays planted |
| Mid Side Bags (Top) | ~20% of luggage weight | Camp chair, spare parts, sandals, toiletries | Still low, accessible without unpacking the heavy stuff |
| Tank Bag | ~10% of luggage weight | Phone, passport, camera, power bank, rain shell | Forward weight + things you need on the ride |
| Tail Bag | ~10% of luggage weight | Sleeping bag, sleeping pad, tent body, down jacket | Bulky but light — high CG impact is minimal |
The 60/20/10/10 split is a guideline, not a religion. The point is that the bottom of your panniers carries the most weight, and your tail bag is mostly air and feathers. If you find yourself wanting to put the tool roll in the tail bag because it’s easier to reach — stop, and put it back at the bottom of the side. Future-you will thank present-you on the first windy mountain pass.
My Step-by-Step Layout for a 2-Week Trip
This is what I actually pack for a self-sufficient 14-day trip on my CFMOTO 250NK. I run a 30L waterproof tail duffel and two 15L soft side panniers (Enduristan Blizzard 25 if you want the brand). Total luggage weight when fully loaded: around 18 kg.
Left Pannier — The “Garage and Kitchen”
The left side bag carries the mechanical and cooking gear. Heaviest items go to the bottom.
- Bottom layer: Tool roll (sockets, hex keys, T-handle, chain breaker, multimeter, spare master link, zip ties), 12V tire compressor, tubeless plug kit and tire irons, one spare tube wrapped in a sock.
- Middle layer: MSR PocketRocket stove, one 230g fuel canister, nested cooking pots (Sea to Summit Alpha 2-pot set), a small folding spork, salt and pepper in mini grinders, a tiny bottle of cooking oil sealed in a Ziploc.
- Top layer: Dry food in Ziploc bags — oatmeal, instant coffee, freeze-dried dinners, a few protein bars, dried fruit, two packets of soup mix. A micro-fiber camping towel goes flat across the top.
The left pannier weighs roughly 7-8 kg packed. It’s the heaviest bag on the bike, and it sits low.
Right Pannier — Camp Comfort and Cleanup
Right side is camp setup, hygiene, and any spare clothing that won’t fit in the tail bag.
- Bottom layer: Folding camp chair (Helinox Chair One), tent stakes in a stake pouch, footprint folded flat, a length of paracord for clotheslines and emergency repairs.
- Middle layer: First-aid kit (real bandages, painkillers, antihistamine, blister patches, antiseptic wipes, a small tube of antibiotic cream, an emergency space blanket), water filter (Sawyer Squeeze), wash kit (toothbrush, mini toothpaste, biodegradable soap, deodorant).
- Top layer: Camp sandals or flip-flops for after-ride comfort, a packable rain shell if I’m not already wearing one, a quick-dry kitchen towel.
Right pannier weighs roughly 4-5 kg. Lighter than the left, but balanced enough that the bike doesn’t lean to one side at a stop.
Tank Bag — Anything I Need Without Stopping
This is the bag I can reach while moving. Everything in it has to earn its spot.
- Top compartment (clear plastic window): Phone with offline maps loaded (Maps.me + organic offline OSM tiles).
- Main compartment: Passport in a zip-lock, two credit cards in a hard wallet, vehicle registration documents in a waterproof folder, power bank (20,000 mAh) with cable, GoPro and one spare battery, sunglasses case, lip balm, a small notepad and pen for border crossings.
- Side mesh pocket: Earplugs (real ones, foam molds), a few hard candies for when the energy drops at hour six, hand sanitizer.
Tank bag weighs maybe 2 kg fully loaded. The weight sits forward of the rider, which actually helps the bike’s balance in corners — front-end weight bias improves cornering grip on most bikes.
Tail Bag — The Bedroom
Bulky and light. Everything that goes here is volume-heavy but weight-light.
- Left third: Big Agnes Copper Spur HV UL2 tent body and fly, separated. Poles strapped along the bike’s frame on the right side under a small bungee.
- Center third: Down sleeping bag in a compression dry sack (squashed to a melon-sized lump). Inflatable sleeping pad rolled tight beside it. Inflatable camp pillow on top.
- Right third: Clothing dry bag — 2 merino wool t-shirts, 1 long-sleeve merino base layer, 3 pairs of merino socks, 2 pairs of underwear, a packable down jacket, thermal base-layer leggings for cold mountain nights. Everything merino because of how it performs and how rarely it needs washing.
Why merino wool clothing for moto trips
- Naturally resists odor — you can wear the same t-shirt for 3-4 days before it starts to smell. On a 14-day trip, this matters.
- Temperature-regulates in a way synthetics don't — cool when you're hot, warm when it's cold.
- Dries fast — wash a shirt in a river or campsite sink in the evening, it's dry by morning.
- Doesn't melt on contact with sparks (campfires, exhaust pipes) the way polyester does.
Tail bag weighs roughly 4 kg packed. The bag sits high on the passenger seat — but because the contents are mostly air, the practical handling impact is minor.
Five Mistakes I Made So You Don’t Have To
After enough trips, the same lessons keep showing up. Here are the ones I learned by getting them wrong.
1. Always Test-Ride the Loaded Bike
Before any 2-week trip, I do a 30-minute test ride on local roads with the bike fully packed. Highway speeds, a few sharp corners, one emergency-brake test from 60 km/h. Twice in my life I’ve discovered something critical on this test ride — once a strap that hadn’t been tightened (caught it before it failed on the highway), once a rear suspension preload setting that was too soft for the new load (bottomed out over a speed bump and I went back to add three clicks).
A loaded bike behaves differently than your stock bike. It brakes longer. It leans further on the side stand — if your stand was already at the edge of stable, a loaded bike will tip over on a slight slope. It accelerates slower and weaves more in crosswinds. Find this out at home, not on the road at 110 km/h.
2. Pack Two Layers of Waterproofing
Trust no pannier label. Every pannier I’ve owned, soft or hard, “fully waterproof” or otherwise, has eventually let water in — usually through a zipper or a corner seam after enough kilometers of road-spray and washes. The fix is a second layer.
I keep my sleeping bag, my clothing bag, and all electronics inside dedicated dry bags (Sea to Summit Lightweight 8L is my workhorse), which then go inside the pannier. If the pannier wets out in a downpour, my critical gear is still dry. This single habit has saved a trip twice — once during a four-hour mountain storm in the Kaçkars, and once on a botched stream crossing where I lost a pannier underwater for ten seconds.
3. Pack by Order of Use, Not Order of Weight
Inside each bag, the order matters. The thing you need first should be on top, even if it makes a worse weight profile within that single bag. My rain shell isn’t at the bottom of the right pannier with the camp chair, even though it’d fit nicely there. It’s in the tank bag, in a side mesh pocket, where I can grab it in 8 seconds at the side of a road.
A useful mental test: imagine standing in a downpour at the side of the highway and asking yourself which bag you’d have to open. If the answer is more than one bag, you’ve packed wrong.
4. Tape the Bodywork Where Bags Touch It
Soft bags rub. Hard bags clatter. Either way, anywhere a strap, buckle, or pannier surface contacts your bike’s plastic or paint, friction will eat through the finish within a single trip. The fix is painter’s tape or a clear vinyl protective film applied to those contact points before you mount the bags.
I lost the paint on the rear cowl of my 250NK before I learned this, ten thousand kilometers of soft pannier strap slowly buffing the orange off. Two layers of 3M Helicopter Tape now live on every contact zone. Replace every season, never think about it again.
5. Ditch the Packaging at Home
Take food out of cardboard boxes before it leaves your kitchen. Repack rice, oatmeal, spices into Ziploc bags. Pull instructions you’ll never read out of first-aid kits and tool sets. Strip every plastic wrapper that doesn’t earn its place.
The hidden benefit: less packaging means less trash to pack out of remote camps. Every wild-camp bay I’ve left clean has been a bay where I came in with stripped-down food and out with the same Ziplocs to refill. It’s an accidental environmental win that started as a weight optimization.
A Few Words on Top Cases
I haven’t mentioned top boxes — the lockable hard cases that bolt to a tail rack. They’re popular and they have real upsides: lockable storage, weather-tight in any rain, a place to throw a helmet at gas stations. They also have one big downside: they put weight high and far back, which is exactly the wrong place for it.
If you must run a top case, treat it as a place for light, frequently-accessed items only. Helmet, jacket, snacks, paperwork — not tools, food, or anything dense. Better yet, skip the top case entirely and use a soft tail duffel that compresses when half-empty. That’s what I’ve done since the second trip, and the bike rides better for it.
Final Thoughts
A properly packed motorcycle feels nearly stock. You forget you’re carrying 18 kg of luggage. The bike turns when you tell it to, brakes when you ask it to, and behaves predictably in crosswinds.
A badly packed motorcycle reminds you it’s overloaded with every gust, every corner, every speed bump. You ride defensively because the bike feels wrong. You stop more. You drop it more.
Spend the time. Pack heavy stuff low and centered. Carry two layers of waterproofing for anything that has to stay dry. Test-ride before you leave. Once you’ve done it right once or twice, the routine becomes second nature — and the trip becomes about the riding, not the wrestling.
The way you pack a motorcycle camping trip sets the tone for every kilometer that comes after. Get it right at home, and the trip almost takes care of itself.
Disclosure: Some of the links in this article are affiliate links. If you buy gear through them, we may earn a small commission at no extra cost to you. It helps fund the trips that make these guides possible — every piece of gear in this article gets used on real motorcycle trips before it makes the list.
Frequently Asked Questions
Should I use soft bags or hard aluminum panniers?
Hard panniers are lockable, fully waterproof, and give you a flat table at camp — great for paved touring and overnight stops in cities. The downside: they weigh 8-12 kg empty, they stick out wide, and they break legs in low-side crashes off-road. Soft bags (Mosko Moto Backcountry, Enduristan Monsoon, Giant Loop) weigh a third as much, compress when empty, and slide off rocks instead of bending the subframe. For technical dirt riding, soft bags win. For 80%-tarmac touring with secure parking concerns, hard panniers earn their place.
How do I keep my gear from getting wet?
Don't trust your panniers, even the ones labeled waterproof. Pack every item that must stay dry — sleeping bag, clothes, electronics, passport — inside a dedicated dry bag or a heavy-duty contractor trash bag before it goes into the pannier. Two layers of protection. I learned this on a four-hour rainstorm into Trabzon where my 'waterproof' tail bag wet out at the zipper after hour two. The dry bag inside saved my sleeping bag. Don't skip the inner layer.
Where should I pack heavy tools?
Low and centered. The bottom of your side panniers, as close to the bike's centerline as possible. A heavy tool roll mounted on a skid plate is even better if your bike has the option. The reason: weight low to the ground keeps your center of gravity low, which keeps the bike stable in corners and easy to pick up after a drop. Weight up high — on a top box or strapped to a tail rack — makes the bike top-heavy and unpredictable, especially in crosswinds and off-road.
How long does it take to pack a bike properly?
Day one of a 2-week trip: 45 minutes to an hour, slow and deliberate. Every subsequent morning: 15-20 minutes once you've found a rhythm. The mistake is rushing day one — pack lazy at the start of the trip and you'll spend the next 13 days digging through panniers to find things. Pack carefully day one, and you can break camp at sunrise without fully waking up.